The Crochet PATTERN Tiny Dinosaur is a sweet little amigurumi project for making a soft pocket-size dinosaur with a rounded head, tiny arms, small feet, and a playful handmade look. This kind of crochet dinosaur is perfect if you love cute animal patterns, beginner-friendly amigurumi, and small projects that work up quickly.
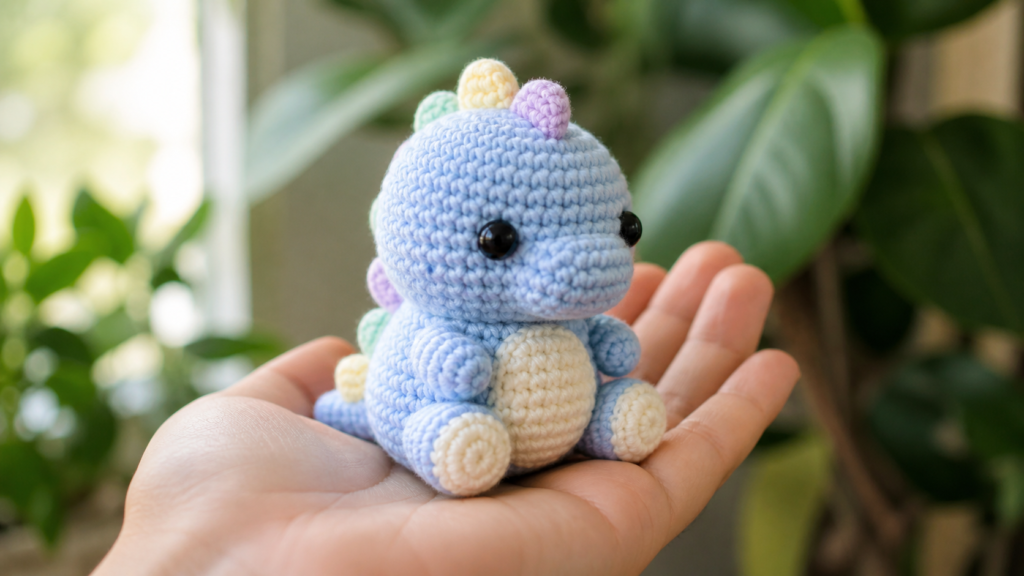
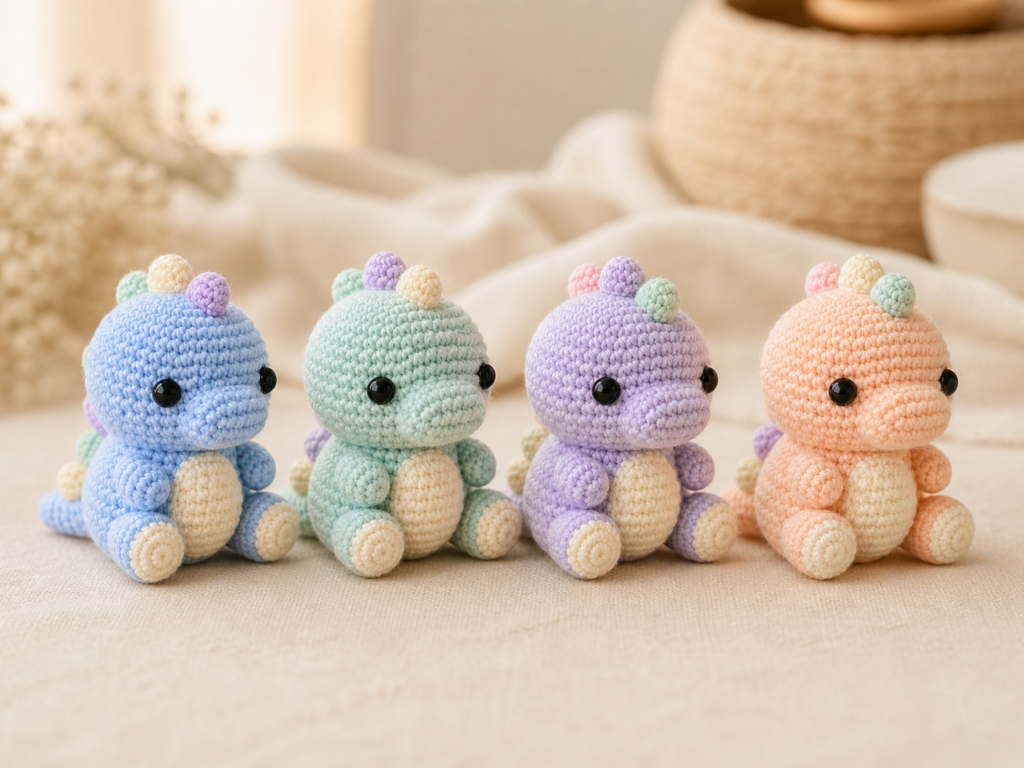
This tiny dinosaur has a gentle baby-dino style, with a soft blue body, cream belly, cream feet, glossy black eyes, and small colorful spikes along the head and back. It is small enough to hold in one hand, which makes it a lovely handmade gift, nursery decoration, desk buddy, keychain idea, or craft market project.
What Is a Tiny Dinosaur Crochet Pattern?
A tiny dinosaur crochet pattern is a small amigurumi design made with simple shapes. Instead of making a realistic dinosaur, this style focuses on a cute rounded character with soft proportions and friendly details.
A finished Tiny Dinosaur usually includes:
- Large rounded head
- Small seated body
- Cream belly patch
- Tiny arms
- Short rounded feet
- Glossy black safety eyes
- Small snout shape
- Tiny spikes along the head and back
- Soft handmade crochet texture
The design is simple, but the little details make it feel full of personality.
Why You’ll Love This Pattern
This tiny dinosaur is a fun project because it is cute, compact, and easy to customize. It looks detailed enough to feel special, but the construction can stay simple and beginner-friendly.
You’ll love this project because:
- It is small and quick to make
- It uses basic amigurumi shapes
- It is great for leftover yarn
- It makes a cute handmade gift
- It works well for nursery decor
- It can be made in many colors
- It is perfect for dinosaur lovers
This is also a great project for practicing shaping, stuffing, and sewing small crochet pieces together.
Skill Level
Skill level: Beginner to easy intermediate
This project is best for crocheters who already know basic amigurumi techniques or want to practice them on a small toy.
You should be familiar with:
- Magic ring
- Single crochet
- Increasing and decreasing
- Working in spiral rounds
- Stuffing small pieces
- Sewing parts together
- Adding safety eyes
- Weaving in yarn ends
If you are new to amigurumi, make one simple ball or oval first before starting the full dinosaur.
Materials You Need
To make a tiny dinosaur, you will need:
- Main color yarn for the body
- Cream or light yarn for the belly and feet
- Small amount of contrast yarn for spikes
- Black safety eyes or black embroidery thread
- Crochet hook suitable for your yarn
- Polyfill stuffing
- Yarn needle
- Stitch marker
- Scissors
- Pins for assembly, optional
Cotton yarn gives clean stitch definition, while plush yarn gives a softer, squishier toy look. Choose the yarn style based on whether you want a firm amigurumi finish or a cuddly mini plush.
Recommended Colors
This dinosaur looks adorable in soft, playful colors.
Try combinations like:
- Soft blue body with cream belly and lavender spikes
- Mint green body with white belly and yellow spikes
- Sage green body with beige belly and brown spikes
- Lavender body with cream belly and pink spikes
- Teal body with pale yellow belly and navy spikes
- Peach body with ivory belly and coral spikes
- Dusty blue body with cream belly and gray spikes
For a baby-dino look, use gentle pastel colors. For a bold dinosaur, use brighter contrast colors.
Finished Look
The finished tiny dinosaur should look small, rounded, and friendly. The head is slightly larger than the body, giving it a cute chibi-style shape. The arms are short, the feet face forward, and the spikes sit neatly along the top of the head and back.
The body should be soft but firm enough to hold its seated shape. Keep the details simple so the dinosaur stays clean, cute, and beginner-friendly.
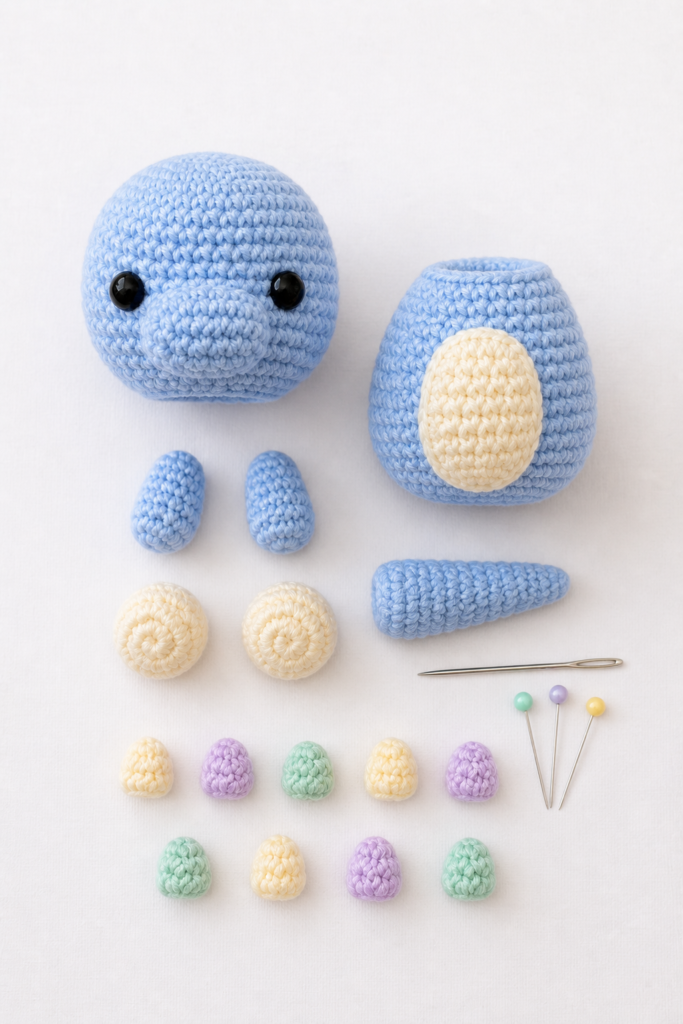
How the Tiny Dinosaur Is Made
The Tiny Dinosaur is made from several simple amigurumi parts:
- Head
- Body
- Belly patch
- Arms
- Feet
- Spikes
- Tail, optional
- Face details
The head and body create the main shape, then the small pieces are attached to complete the character.
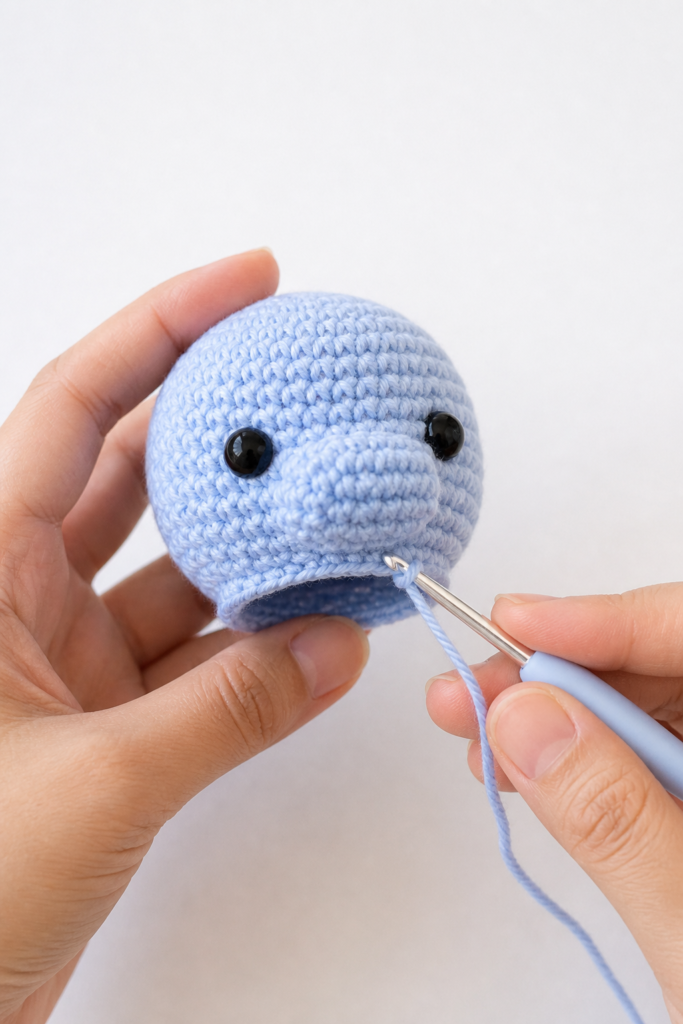
Step 1: Crochet the Head
Start with your main body color and crochet a large rounded head in spiral rounds.
Increase gradually to create the widest part of the head, then work even rounds to build height. Decrease near the bottom to shape the head before closing.
Before fully closing the head, insert the safety eyes and add stuffing. The eyes should sit evenly on the front of the face, giving the dinosaur a soft, friendly expression.
Stuff the head firmly enough to keep it round, but avoid overstuffing because it can stretch the stitches.
Step 2: Crochet the Body
Use the same main color to make a small rounded body. The body should be slightly smaller than the head so the dinosaur keeps a cute baby-amigurumi proportion.
Work in spiral rounds and shape the body into a compact seated form. Stuff it lightly but evenly.
Once the body is complete, check that it can sit upright before attaching the head.
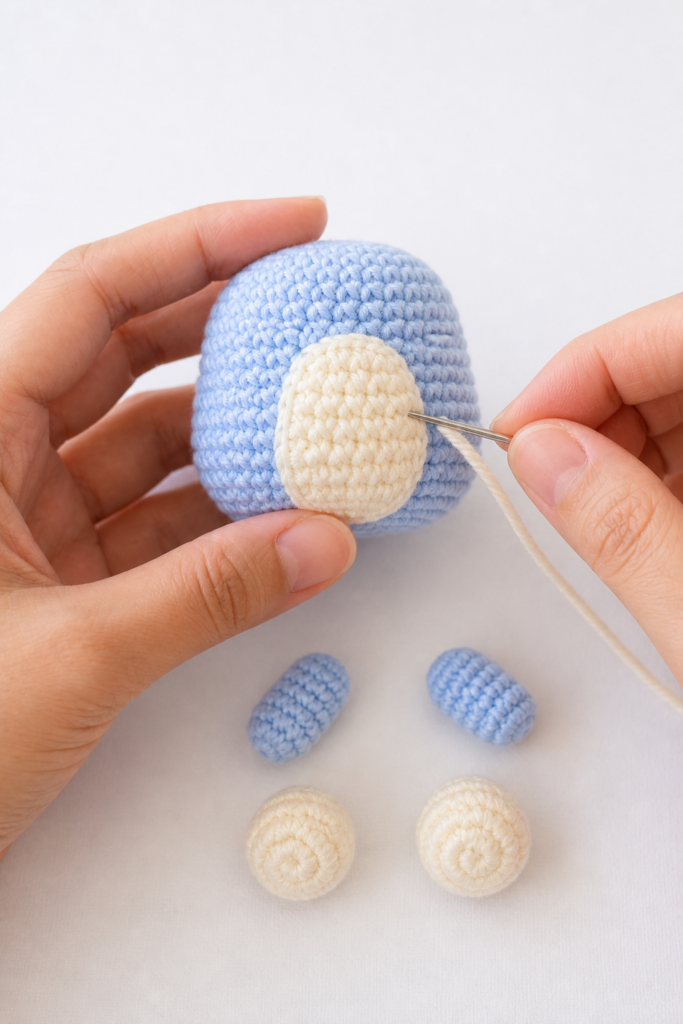
Step 3: Add the Belly Patch
Crochet a small cream or light-colored oval for the belly patch.
Sew it onto the front of the body before adding the arms and feet. This makes the placement easier and helps the front of the dinosaur look neat.
The belly patch should be centered and slightly rounded to match the soft shape of the body.
Step 4: Make the Arms
Crochet two tiny arms using the main body color.
The arms should be short and rounded. They do not need much stuffing, especially if the dinosaur is very small.
Attach the arms to the sides of the body, just below the head. Angle them slightly forward so the dinosaur looks like it is sitting sweetly.
Step 5: Make the Feet
Crochet two short rounded feet using the cream or light-colored yarn.
The feet should sit at the bottom front of the body. Sew them evenly so the dinosaur has a balanced seated pose.
If you want extra detail, you can add tiny embroidered toes, but keep them simple so the design stays clean.
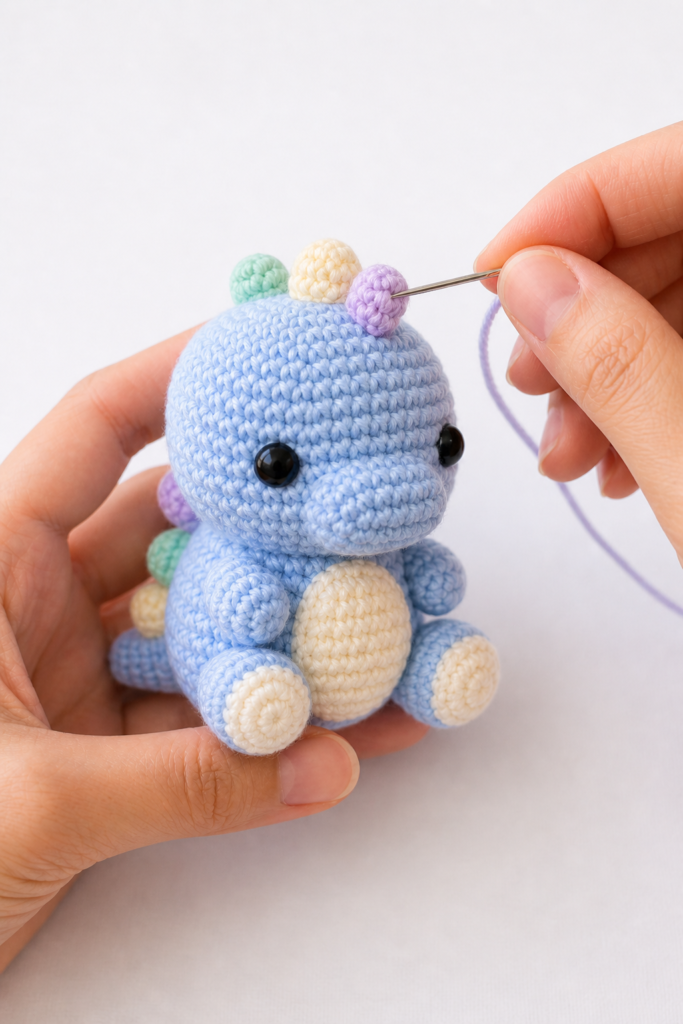
Step 6: Add the Spikes
The spikes give the tiny dinosaur its playful character.
Make several small triangle or rounded spike pieces using a contrast color. Attach them starting at the top of the head and continue down the back.
Keep the spikes small and soft. They should add personality without making the dinosaur look too busy.
You can use one spike color or alternate colors for a more playful look.
Step 7: Add the Tail
A small tail is optional, but it helps the dinosaur look more complete.
Crochet a short tapered tail using the main body color and sew it to the back of the body. Position it low enough to support the seated pose if possible.
The tail should be small, rounded, and slightly curved.
Step 8: Final Assembly
Before sewing everything permanently, pin all pieces in place.
Check that:
- The eyes are even
- The head is centered
- The belly patch is straight
- The arms match
- The feet are balanced
- The spikes follow the center line
- The tail sits neatly at the back
Once the placement looks right, sew each piece securely and weave in all yarn ends.
Beginner Tips
Use a stitch marker at the beginning of each round so you do not lose your place.
Stuff the head and body gradually. Small amigurumi pieces can become uneven if you add too much stuffing at once.
Pin the arms, feet, and spikes before sewing them. This helps keep the design symmetrical.
Use a smaller hook than your yarn label suggests to keep the stitches tight and prevent stuffing from showing.
If you are making this for a baby or young child, embroider the eyes instead of using safety eyes.
Ways to Customize Your Tiny Dinosaur
You can make your dinosaur unique with simple changes.
Try:
- Changing the body color
- Using rainbow spikes
- Adding tiny embroidered cheeks
- Making a longer tail
- Adding a keychain loop
- Making a dinosaur family in different sizes
- Using plush yarn for a softer toy
- Using cotton yarn for sharper stitch detail
- Creating a pastel nursery set
You can also make several dinosaurs in different colors for a cute handmade collection.
Perfect Uses for a Tiny Dinosaur
This tiny dinosaur is perfect for:
- Nursery decor
- Baby shower gifts
- Desk decorations
- Keychains
- Bag charms
- Handmade market products
- Kids’ play sets
- Dinosaur-themed party favors
- Crochet garlands
- Cute shelf displays
Because it is small, it is also a good project for using leftover yarn from larger amigurumi patterns.
Color Collection Ideas
Pastel Dino Set
Use soft blue, mint, lavender, blush, and cream for a gentle baby-dino collection.
Jungle Dino Set
Use sage green, olive, beige, brown, and cream for a natural dinosaur look.
Rainbow Spike Set
Use one main body color and add colorful spikes along the head and back.
Nursery Neutral Set
Use ivory, oatmeal, dusty blue, soft gray, and sage for a calm handmade nursery style.
Care Instructions
Care depends on the yarn you choose.
For cotton or acrylic yarn, spot cleaning or gentle hand washing is usually best. If the dinosaur has safety eyes, avoid rough machine washing.
Let the dinosaur air dry completely before storing it.
If the toy is made for a baby or toddler, make sure all pieces are sewn on securely and use embroidered eyes instead of safety eyes.
Final Thoughts
The Crochet PATTERN Tiny Dinosaur is a cute, small, and creative amigurumi project that is perfect for dinosaur lovers and handmade toy makers. With a rounded head, tiny arms, little feet, and playful spikes, this mini dinosaur has a sweet personality while staying simple enough for beginner-friendly crochet practice.
Make one as a quick gift, or create a whole tiny dinosaur family in different colors for a fun handmade collection.