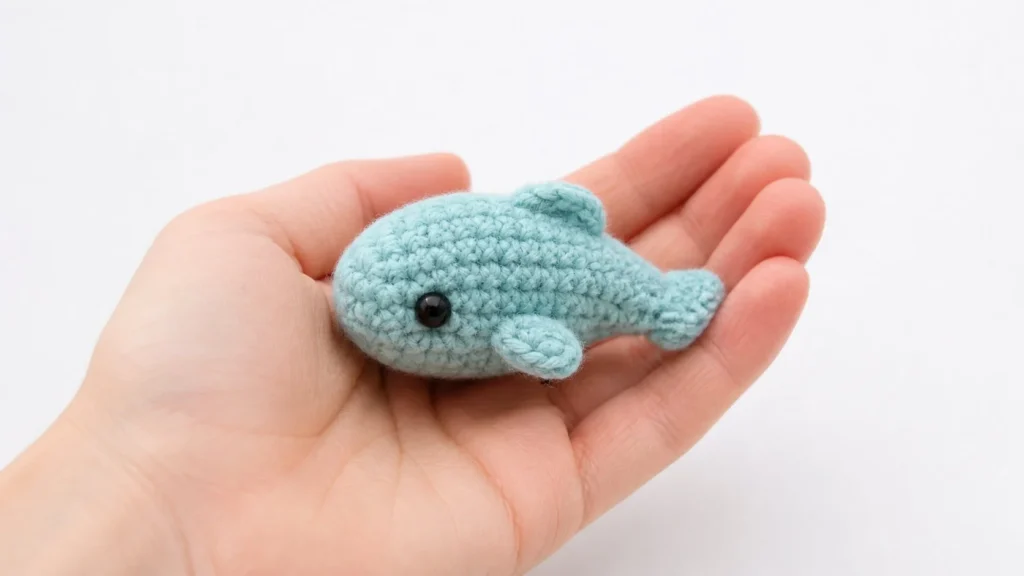
The Mini Minnows Crochet Pattern is a sweet little amigurumi project for making tiny crochet fish with soft rounded bodies, tiny fins, and playful handmade charm. These small minnows are quick to make, easy to customize, and perfect for using leftover yarn from your stash.
This project is great if you want something small, cute, and beginner-friendly. Each minnow can be made in different colors, so you can create a full school of tiny fish for nursery decor, keychains, market makes, baby mobiles, or ocean-themed gifts.
What Are Mini Minnows?
Mini Minnows are tiny crochet fish made in amigurumi style. They have a compact body, simple tail, small fins, and cute safety eyes or embroidered eyes.
The design is intentionally simple, but still full of personality. You can make each minnow in soft pastel colors, bright tropical shades, or natural fish-inspired tones.
A finished Mini Minnow usually includes:
- Small rounded fish body
- Tapered tail shape
- Tiny side fins
- Small top fin, optional
- Glossy safety eyes or embroidered eyes
- Soft plush crochet texture
- Cute pocket-size shape
Why You’ll Love This Pattern
The Mini Minnows pattern is a relaxing project because it works up quickly and does not require complicated shaping.
You’ll love it because:
- It is small and beginner-friendly
- It uses very little yarn
- It is easy to batch-make
- It works well for gifts and decor
- It can be made in many color combinations
- It is cute enough for kids, nurseries, and ocean-themed projects
This is also a great project for practicing amigurumi basics without committing to a large stuffed animal.
Skill Level
Skill level: Beginner to easy intermediate
This project is simple, but it helps if you already know the basics of amigurumi.
You should be familiar with:
- Magic ring
- Single crochet
- Increasing and decreasing
- Working in spiral rounds
- Stuffing small pieces
- Sewing small parts
- Weaving in yarn ends
If you are still new to crochet, start with one plain minnow before adding extra fins or color changes.
Materials You Need
To make Mini Minnows, you will need:
- Yarn in your chosen fish colors
- Small amount of white or cream yarn, optional
- Black safety eyes or black embroidery thread
- Crochet hook suitable for your yarn
- Polyfill stuffing
- Yarn needle
- Stitch marker
- Scissors
- Pins for assembly, optional
Cotton yarn gives clean stitch definition, while plush yarn creates a soft and squishy toy-like finish.
Recommended Colors
Mini Minnows look beautiful in both soft and bright colors.
Try combinations like:
- Aqua blue and white
- Coral pink and cream
- Soft yellow and orange
- Lavender and light blue
- Mint green and white
- Sky blue and navy
- Peach and ivory
- Teal and turquoise
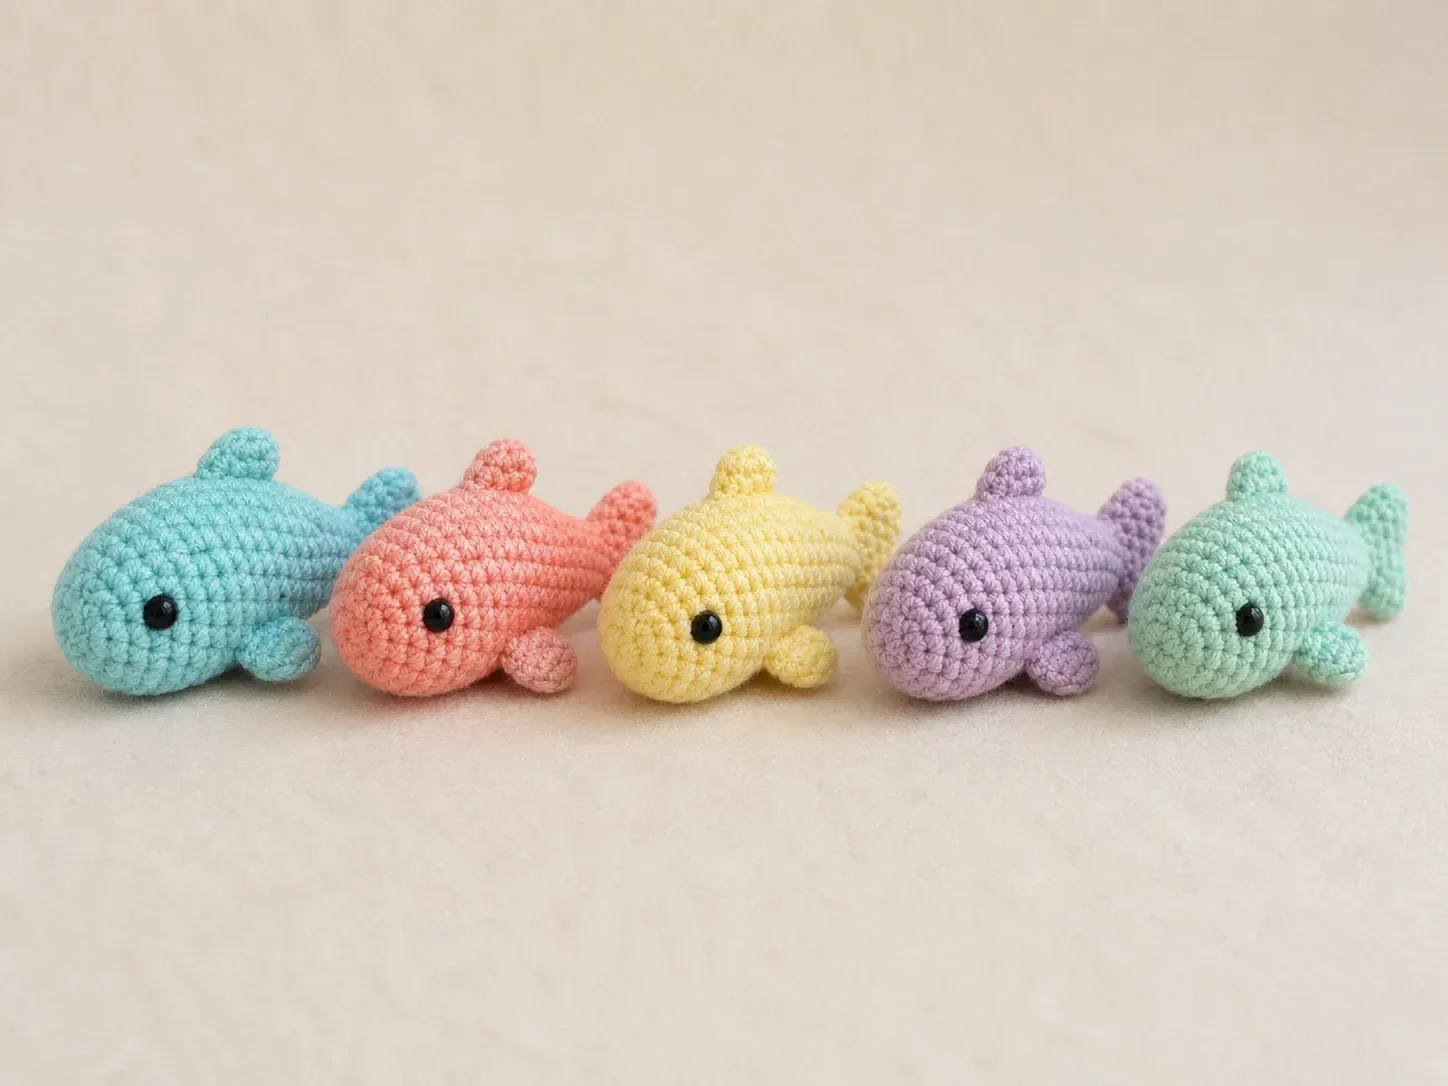
For a cute collection, make several minnows in different colors and arrange them together like a tiny fish family.
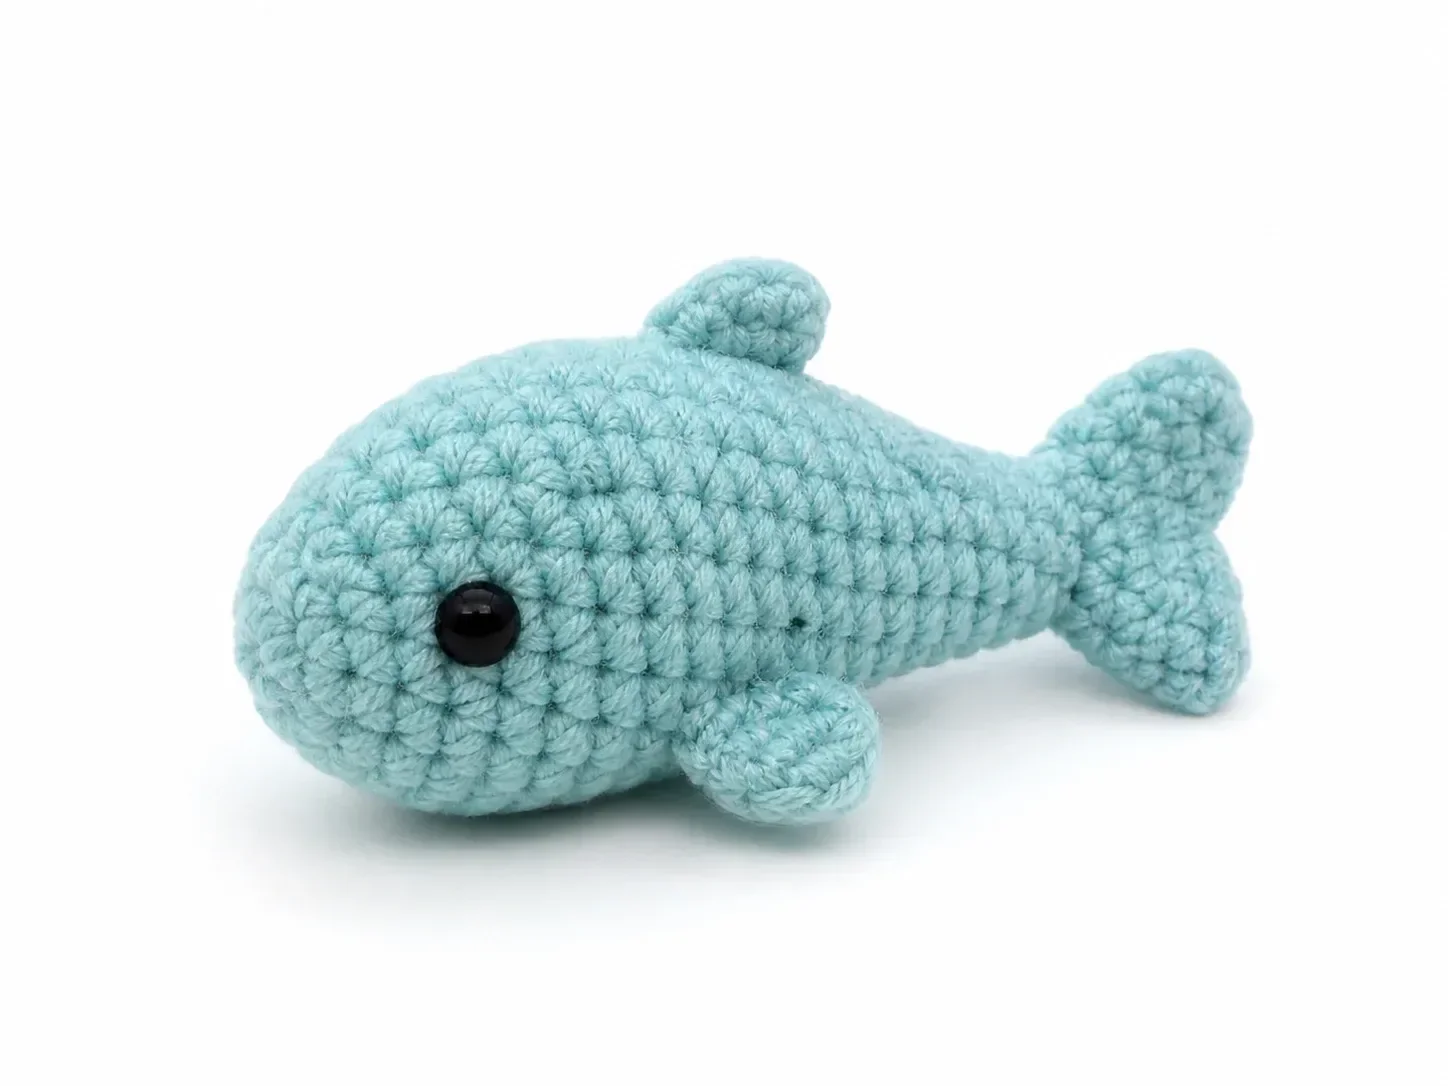
Finished Look
The finished minnow should look small, rounded, and slightly curved, with a cute face and a simple tail. The body should be soft but firm enough to hold its shape.
The tail and fins should stay small so the fish keeps a clean, simple silhouette. This makes the design easier to finish and more beginner-friendly.
How the Mini Minnow Is Made
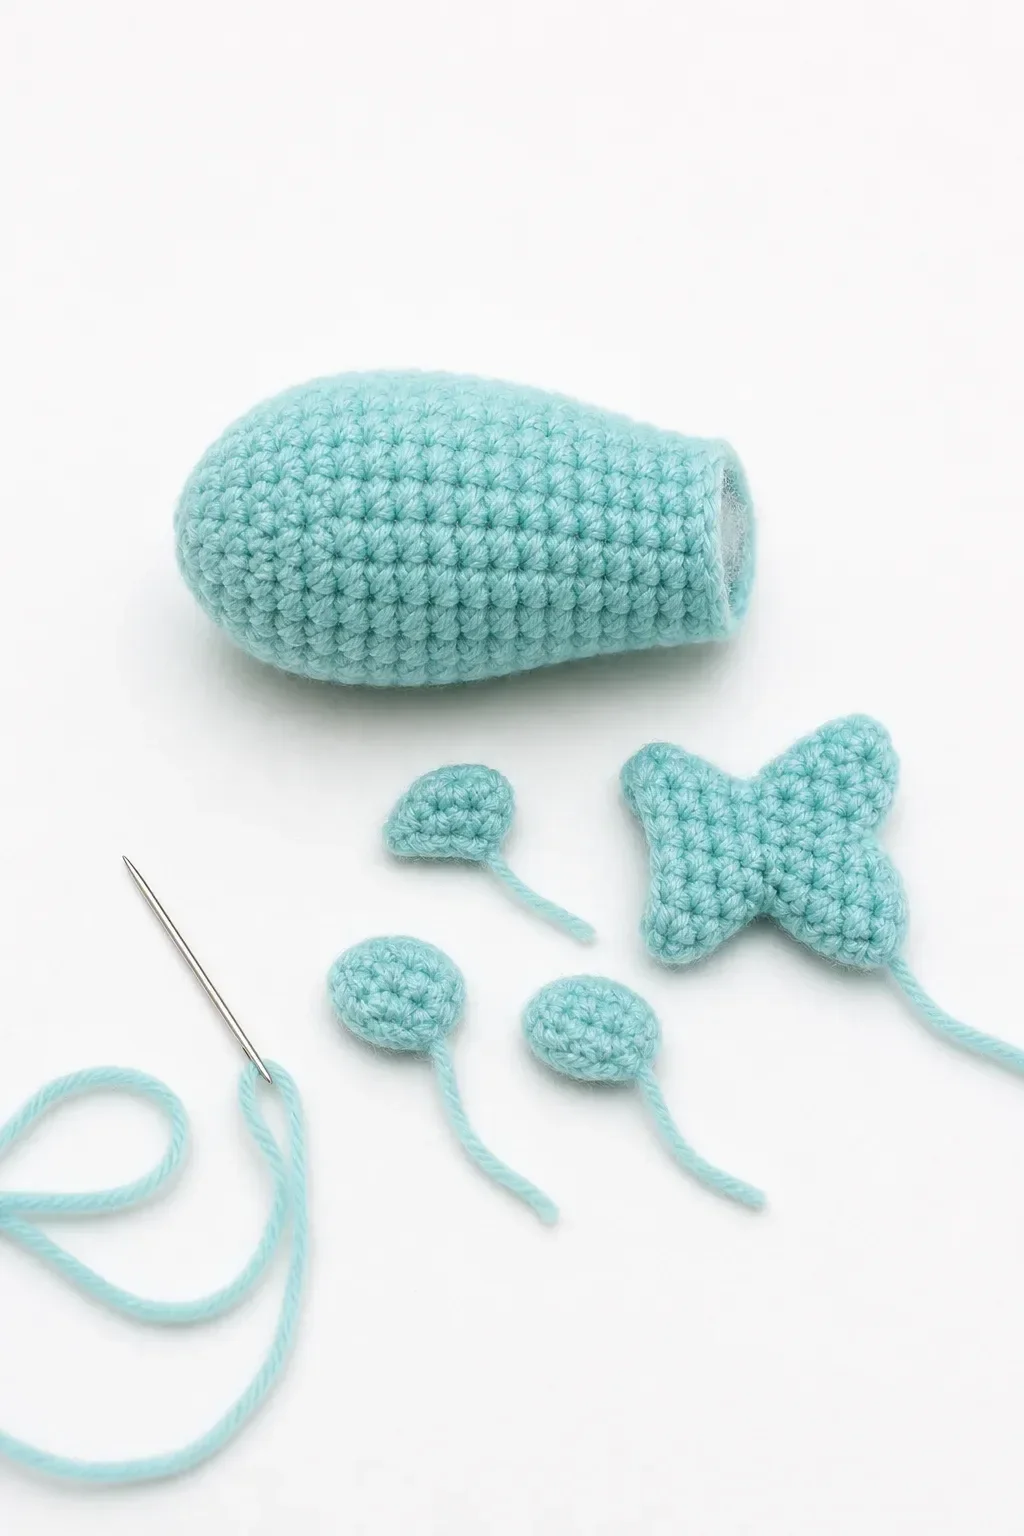
The Mini Minnow is created in a few simple parts:
- Body
- Tail
- Side fins
- Top fin, optional
- Face details
The body is the main piece. The tail and fins are added after the body is complete.
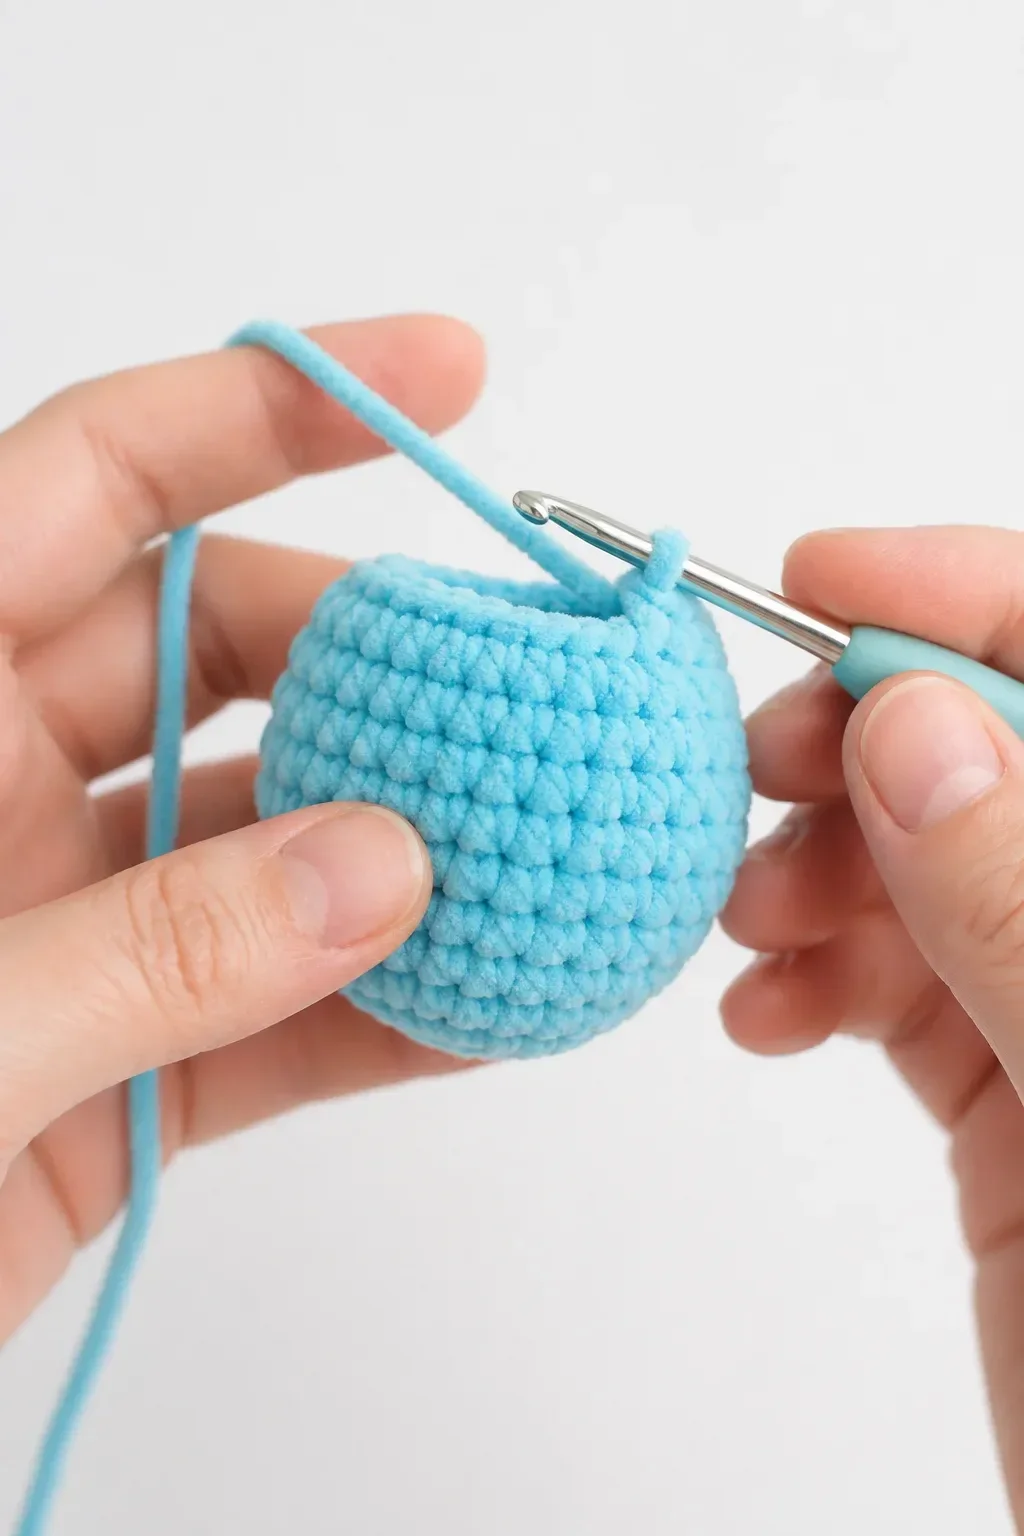
Step 1: Crochet the Body
Start with your main yarn color and make a small rounded body using amigurumi rounds.
Begin with a magic ring, increase gradually to create the widest part of the fish, then work a few even rounds to build the body length.
After that, decrease slowly to taper the back of the fish.
Stuff the body lightly as you go. Do not overstuff it, because the fish should stay soft and rounded.
Step 2: Shape the Tail End
The tail end should be narrower than the front of the body. This gives the minnow a natural fish shape.
Once the body is almost closed, leave a small tail area where the tail fin will be attached.
Keep the back slightly tapered so the tail sits neatly.
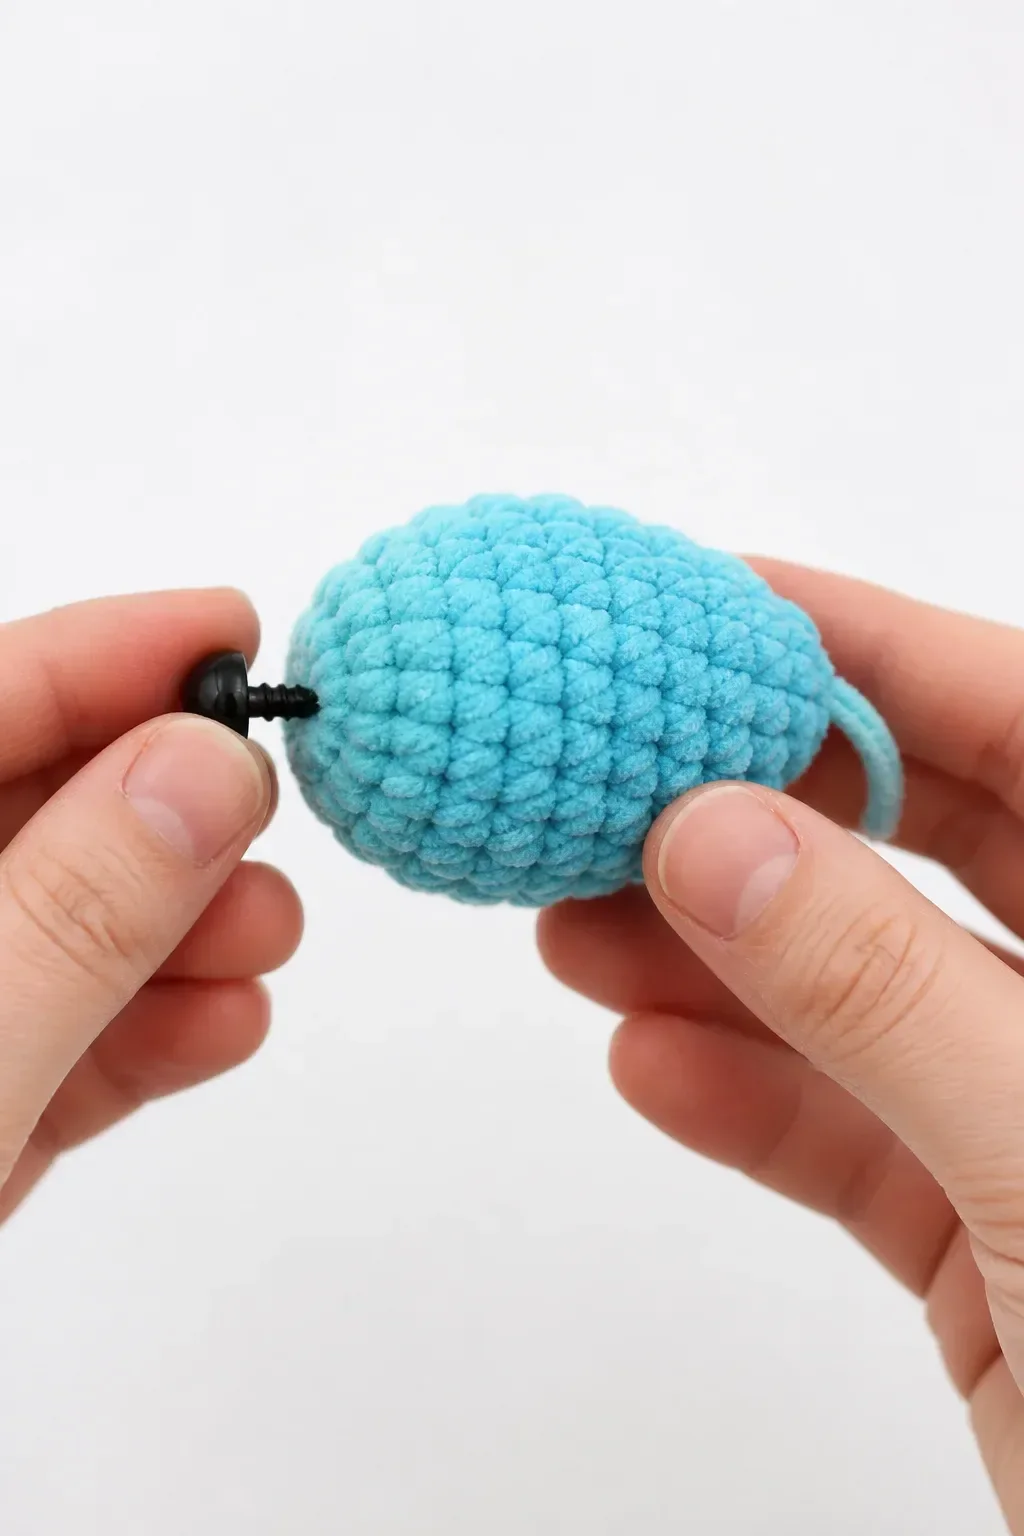
Step 3: Add the Eyes
Add safety eyes near the front of the body before fully closing the piece. If the minnow is very small or intended for a baby item, embroidered eyes are safer.
Place the eyes evenly on both sides of the face area.
For extra cuteness, you can add tiny embroidered lashes or a small smile, but keep the face simple so the fish stays clean and minimal.
Step 4: Crochet the Tail
Make a small tail fin using the same yarn color or a contrasting color.
The tail can be shaped like:
- A small flat triangle
- A rounded double-fin shape
- A tiny fan shape
Sew the tail securely to the narrow end of the body. Make sure it is centered so the fish looks balanced.
Step 5: Make the Side Fins
Crochet two tiny fins and attach one to each side of the body.
The fins should be small and slightly rounded. They do not need to be stuffed.
Position the fins near the middle of the body, slightly below the eyes, so the minnow looks like it is swimming.
Step 6: Add a Top Fin
A top fin is optional, but it can make the minnow look more finished.
Use the same color as the tail or a contrasting color. Attach it along the top center of the body.
Keep the top fin small so it does not overpower the fish.
Step 7: Final Assembly
Before sewing all parts permanently, place the tail and fins with pins.
Check that:
- The eyes are even
- The tail is centered
- The side fins match
- The body shape looks smooth
- The fish can lie flat or sit nicely in a display
Once everything looks balanced, sew each piece firmly and weave in all yarn ends.
Beginner Tips
Use a stitch marker at the beginning of each round so you do not lose your place.
Stuff the body gradually. Small amigurumi pieces can become lumpy if stuffed too quickly.
Use a smaller hook than your yarn label suggests to keep the stitches tight.
If you are making several minnows, keep notes on your yarn and hook size so the set stays consistent.
Pin the fins before sewing. This helps keep both sides even.
Ways to Customize Your Mini Minnows
This pattern is easy to personalize. You can make each fish unique with small design changes.
Try:
- Striped bodies
- Two-tone tails
- Pastel color sets
- Bright tropical colors
- Tiny embroidered cheeks
- A keychain loop
- A baby mobile set
- A garland of fish
- A full ocean animal collection
You can also make a larger parent fish and several tiny minnows for a cute family-style display.
Perfect Uses for Mini Minnows
Mini Minnows are perfect for many handmade projects, including:
- Nursery decor
- Baby mobiles
- Ocean-themed gifts
- Keychains
- Bag charms
- Desk decorations
- Handmade market products
- Kids’ play sets
- Crochet garlands
Because they are small, they are also great for craft fairs or quick weekend projects.
Color Collection Ideas
If you want your minnows to look like a cohesive set, choose a color palette before starting.
Pastel Ocean Set
Use soft blue, mint, lavender, blush, and cream.
Tropical Reef Set
Use coral, turquoise, yellow, orange, and bright blue.
Neutral Nursery Set
Use beige, ivory, dusty blue, sage, and soft gray.
Rainbow Minnow Set
Make one fish in each rainbow color for a playful collection.
Care Instructions
Care depends on the yarn you choose.
For cotton or acrylic yarn, gently hand wash or spot clean when needed. If the fish has safety eyes, avoid rough machine washing.
Let the minnow air dry completely before storing it.
If the minnow is used as a baby item, make sure all parts are securely attached and consider embroidered eyes instead of safety eyes.
Final Thoughts
The Mini Minnows Crochet Pattern is a cute, quick, and creative amigurumi project. These tiny fish are simple enough for beginners but charming enough to turn into gifts, decorations, keychains, or full handmade collections.
With a small rounded body, tiny fins, and playful colors, each minnow has its own personality. Make one as a quick project, or create a whole school of Mini Minnows for a sweet ocean-inspired crochet set.