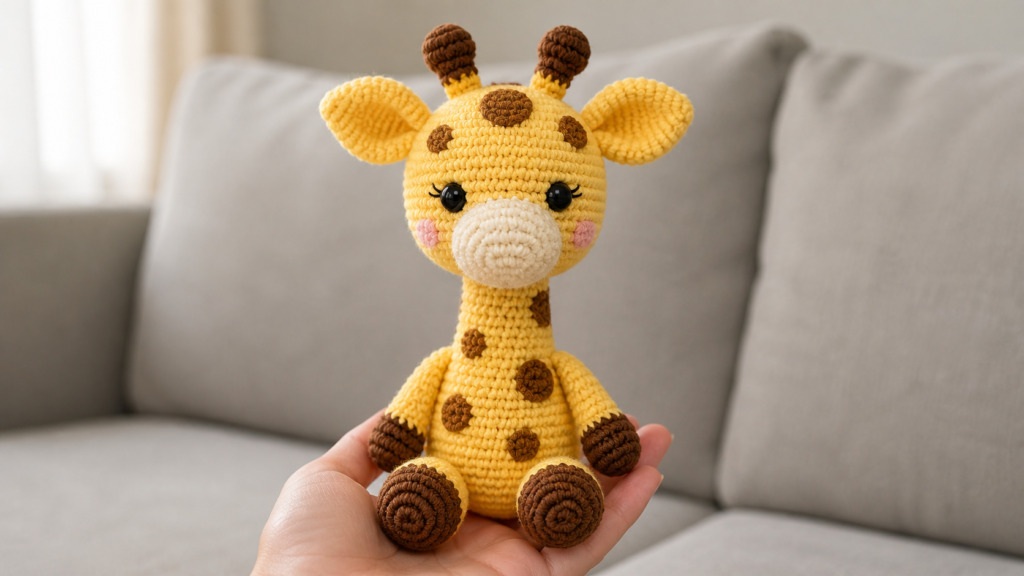
The Crochet Giraffe Pattern is a sweet amigurumi project for making a soft handmade giraffe with a long neck, rounded head, floppy ears, tiny horns, and warm brown spots. This kind of crochet giraffe is perfect for nursery decor, baby shower gifts, handmade toys, shelf displays, and cozy animal collections.
This giraffe has a cheerful yellow body, soft cream muzzle, brown hooves, brown ossicones, and little brown spots that make it instantly recognizable. The design feels cute, gentle, and beginner-friendly while still having enough detail to look special.
What Is a Crochet Giraffe?
A crochet giraffe is a handmade amigurumi animal made with simple shapes joined together. Instead of a realistic giraffe, this design focuses on a cute plush-style character with soft rounded features.
A finished crochet giraffe usually includes:
- Rounded head
- Long narrow neck
- Seated body
- Soft muzzle
- Two small horns
- Large floppy ears
- Thin arms and legs
- Brown hooves
- Brown body spots
- Sweet embroidered face details
The result is a soft, giftable handmade toy with a playful safari-animal look.
Why You’ll Love This Pattern
This crochet giraffe is a lovely project because it feels cute and detailed without needing overly complicated construction. Most of the shape comes from simple amigurumi rounds, while the ears, horns, spots, and muzzle add personality.
You’ll love this project because:
- It makes a beautiful handmade gift
- It works well for nursery decor
- It has a cute seated pose
- It uses classic amigurumi techniques
- It can be customized with different colors
- It is perfect for animal crochet collections
- It looks adorable in blog and Pinterest photos
This is also a fun project if you want to practice sewing small pieces neatly onto a larger amigurumi body.
Skill Level
Skill level: Easy intermediate
This project is best for crocheters who already understand basic amigurumi or want to move beyond very simple crochet animals.
You should be comfortable with:
- Magic ring
- Single crochet
- Increasing and decreasing
- Working in spiral rounds
- Stuffing pieces evenly
- Sewing small details
- Embroidering simple face details
- Weaving in yarn ends
If you are newer to amigurumi, take your time with the face, ears, and spots. These details make a big difference in the final look.
Materials You Need
To make a crochet giraffe, you will need:
- Yellow yarn for the body
- Brown yarn for hooves, horns, and spots
- Cream or pale pink yarn for the muzzle
- Black embroidery thread or safety eyes
- Small amount of pink thread or yarn for cheeks, optional
- Crochet hook suitable for your yarn
- Polyfill stuffing
- Yarn needle
- Stitch marker
- Scissors
- Pins for assembly
Cotton yarn gives neat stitch definition and a polished amigurumi finish. Soft acrylic or plush yarn creates a cuddlier toy with a warmer handmade look.
Recommended Colors
For a classic giraffe look, use:
- Yellow for the head, neck, body, arms, legs, and ears
- Brown for the hooves, spots, and horns
- Cream or pale pink for the muzzle
- Black for the eyes, lashes, and small face details
- Soft pink for optional cheek blush
You can also create a softer nursery-style giraffe with beige, ivory, caramel, and warm tan tones.
Finished Look
The finished crochet giraffe should look soft, friendly, and slightly playful. The long neck gives it its giraffe shape, while the seated body and rounded limbs keep it cute and huggable.
The head should sit securely on the neck, the ears should angle outward, and the horns should stand neatly on top. Brown spots can be placed across the head, neck, and body to make the design feel complete.
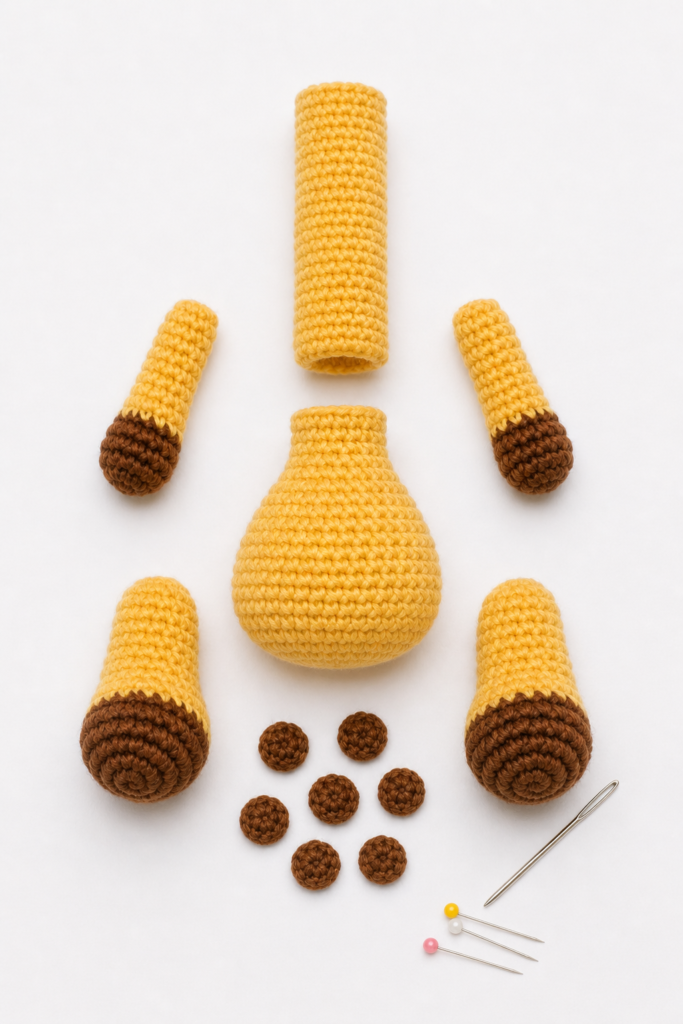
How the Crochet Giraffe Is Made
The giraffe is made from several amigurumi parts:
- Head
- Body
- Neck
- Arms
- Legs
- Ears
- Horns
- Muzzle
- Spots
- Face details
The main pieces are crocheted separately, stuffed, and sewn together. The small details are added near the end.
Step 1: Crochet the Head
Start with yellow yarn and make a rounded head in spiral rounds. Shape it with increases and decreases until it looks soft and full.
Before closing the head, add the safety eyes or plan where you will embroider the eyes. Leave enough space for the muzzle, which will be attached to the lower front of the face.
Stuff the head firmly enough to keep its shape, but do not overstuff it. The stitches should stay neat and even.

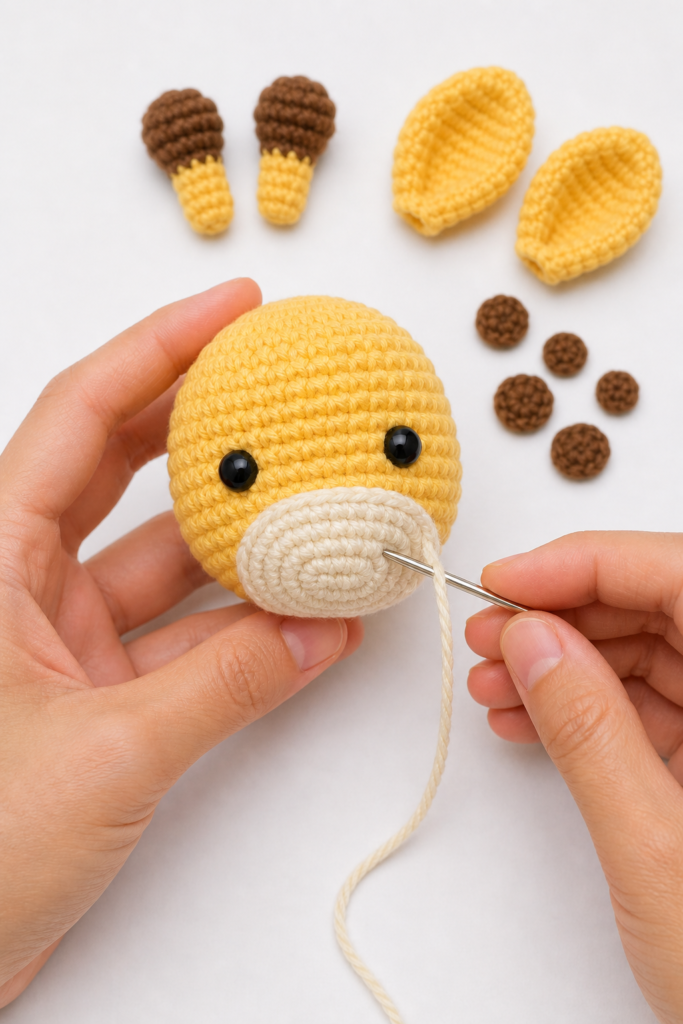
Step 2: Make the Muzzle
Use cream or pale pink yarn to crochet a rounded oval muzzle.
Sew the muzzle to the lower front of the head. This gives the giraffe its gentle expression and soft baby-animal look.
You can embroider a tiny smile or small nostrils if you want extra detail. Keep the face simple and sweet.
Step 3: Crochet the Neck and Body
The neck should be long and narrow enough to create the giraffe shape, but firm enough to support the head.
Crochet the body as a seated oval shape using yellow yarn. Stuff it evenly, then attach the neck securely to the top of the body.
When joining the head, use enough stitches so the giraffe feels stable and does not wobble too much.
Step 4: Make the Arms and Legs
Crochet two arms and two legs using yellow yarn.
For the hooves, start or finish each limb with brown yarn. This gives the giraffe a classic color contrast.
The arms should be slim and soft. The legs can be slightly longer and rounded at the ends so the giraffe sits nicely.
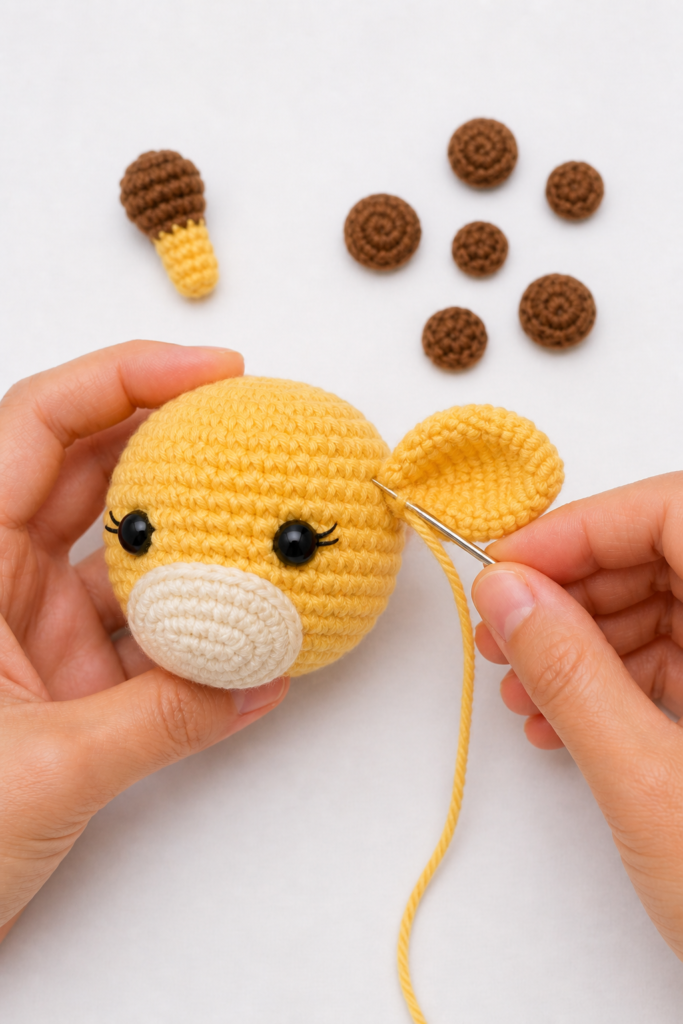
Step 5: Crochet the Ears
Make two yellow ears with a soft oval or leaf-like shape.
You can add a slightly lighter inner-ear detail if you want a more finished look. Attach the ears to the sides of the head, slightly below the horns.
The ears should sit outward and slightly downward for a cute, gentle expression.
Step 6: Make the Horns
The small giraffe horns, also called ossicones, are one of the most important details.
Crochet two short brown horns with rounded tips. Attach them evenly on top of the head.
Make sure both horns stand upright and are placed symmetrically.
Step 7: Add the Spots
Crochet or embroider small brown spots in different sizes.
Place them on:
- The forehead
- The side of the head
- The neck
- The body
- The arms or legs, optional
Do not make every spot identical. A mix of small and medium spots gives the giraffe a more natural and charming look.
Step 8: Add Face Details
The face brings the giraffe to life.
You can add:
- Small black eyes
- Tiny eyelashes
- Embroidered nostrils
- A simple smile
- Soft pink cheeks
If the giraffe is for a baby or toddler, embroidered eyes are safer than safety eyes.
Step 9: Final Assembly
Before sewing everything permanently, pin the parts in place.
Check that:
- The head is centered
- The neck is straight
- The ears are even
- The horns match
- The muzzle is centered
- The arms sit at the same height
- The legs help the giraffe sit
- The spots look balanced
Once everything looks right, sew each piece securely and weave in all yarn ends.

Beginner Tips
Use stitch markers to track the beginning of each round.
Stuff the neck firmly so it can support the head.
Pin every piece before sewing. This helps avoid uneven ears, crooked horns, or misplaced spots.
Use a smaller hook than your yarn label suggests to keep the stitches tight.
Add spots slowly. Step back and check the full giraffe before sewing all of them down.
If using safety eyes, attach them before closing the head.
Ways to Customize Your Crochet Giraffe
This giraffe is easy to personalize with colors and details.
Try:
- A pastel nursery giraffe
- A beige and caramel safari giraffe
- A pink or lavender baby giraffe
- Embroidered sleepy eyes
- A tiny bow or scarf
- Longer legs for a floppy toy style
- Plush yarn for a softer cuddly version
- Cotton yarn for sharper stitch definition
You can also make a whole safari animal set with a lion, elephant, zebra, monkey, and hippo.
Perfect Uses for a Crochet Giraffe
A crochet giraffe makes a lovely:
- Baby shower gift
- Nursery shelf decoration
- Handmade birthday present
- Safari-themed party favor
- Desk buddy
- Craft market product
- Crochet animal collection piece
- Soft handmade toy
Because giraffes are popular nursery animals, this pattern works especially well for baby-themed handmade gifts.
Color Collection Ideas

Classic Safari Giraffe
Use bright yellow, warm brown, cream, and black.
Soft Nursery Giraffe
Use ivory, oatmeal, tan, caramel, and blush.
Pastel Baby Giraffe
Use pale yellow, peach, cream, and soft pink.
Modern Neutral Giraffe
Use beige, mocha, ivory, taupe, and muted brown.
Care Instructions
Care depends on the yarn you choose.
For cotton or acrylic yarn, gentle hand washing or spot cleaning is usually best. Avoid rough machine washing, especially if the giraffe has safety eyes, embroidered lashes, or sewn-on spots.
Let the giraffe air dry completely before storing it.
If the toy is made for a baby or toddler, make sure all pieces are sewn securely and use embroidered eyes instead of safety eyes.
Final Thoughts
The Crochet Giraffe Pattern is a cute and charming amigurumi project for anyone who loves handmade animals. With its long neck, rounded head, floppy ears, tiny horns, brown spots, and sweet face, this giraffe has plenty of personality while still using simple crochet shapes.
Make one as a thoughtful gift, or create a full safari-inspired crochet collection with different animals and colors.