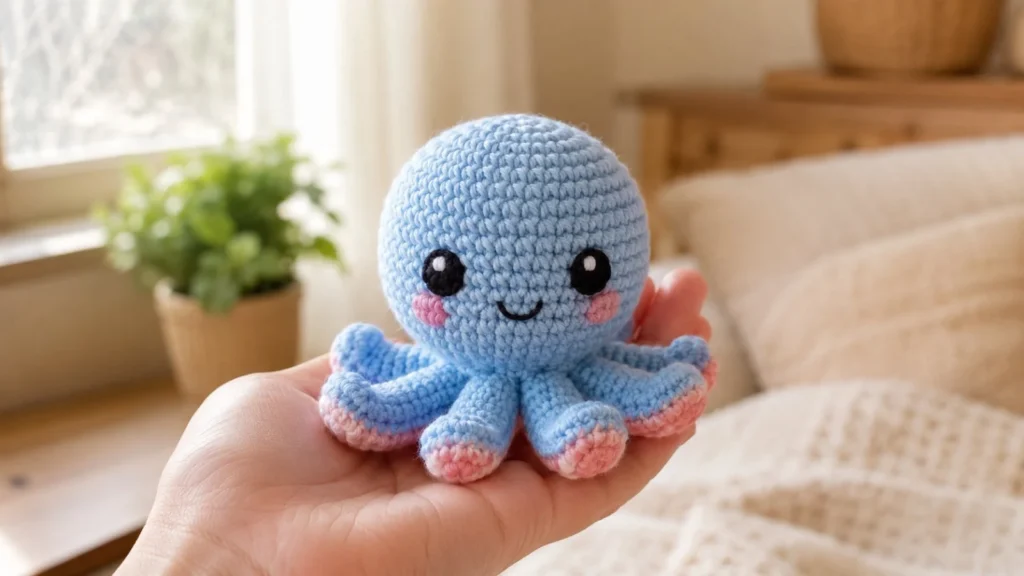
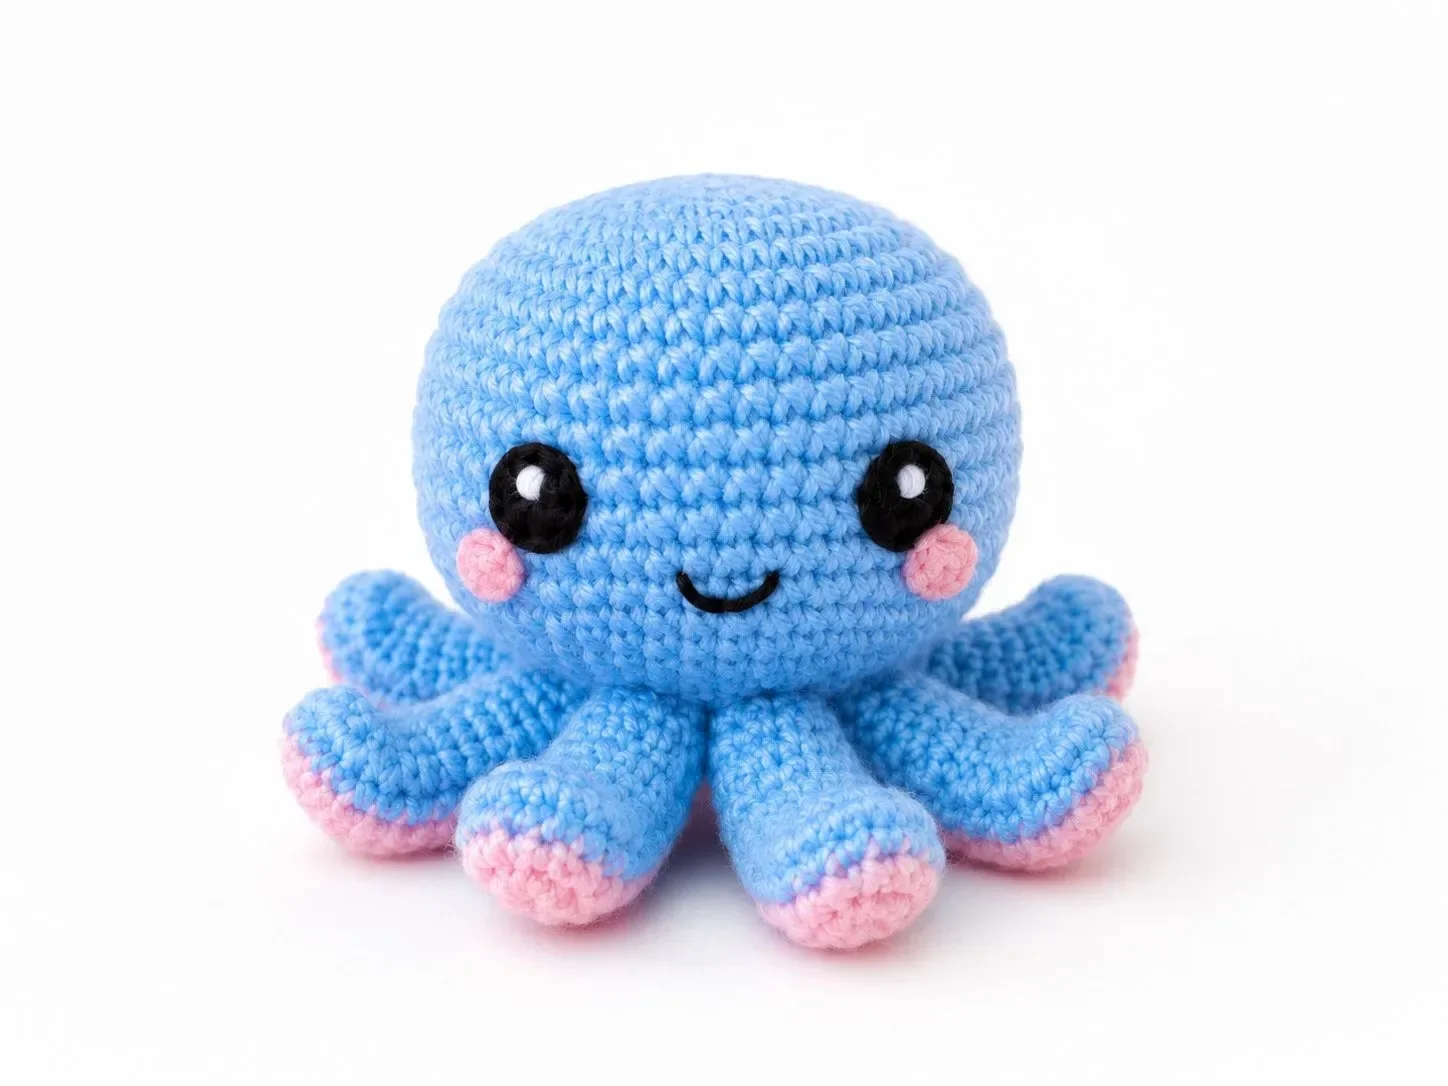
There is something instantly charming about a tiny crochet octopus. With its round little head, soft curling tentacles, shiny eyes, and pink cheeks, this mini amigurumi makes the sweetest handmade gift, desk buddy, nursery decoration, or market-table favorite.
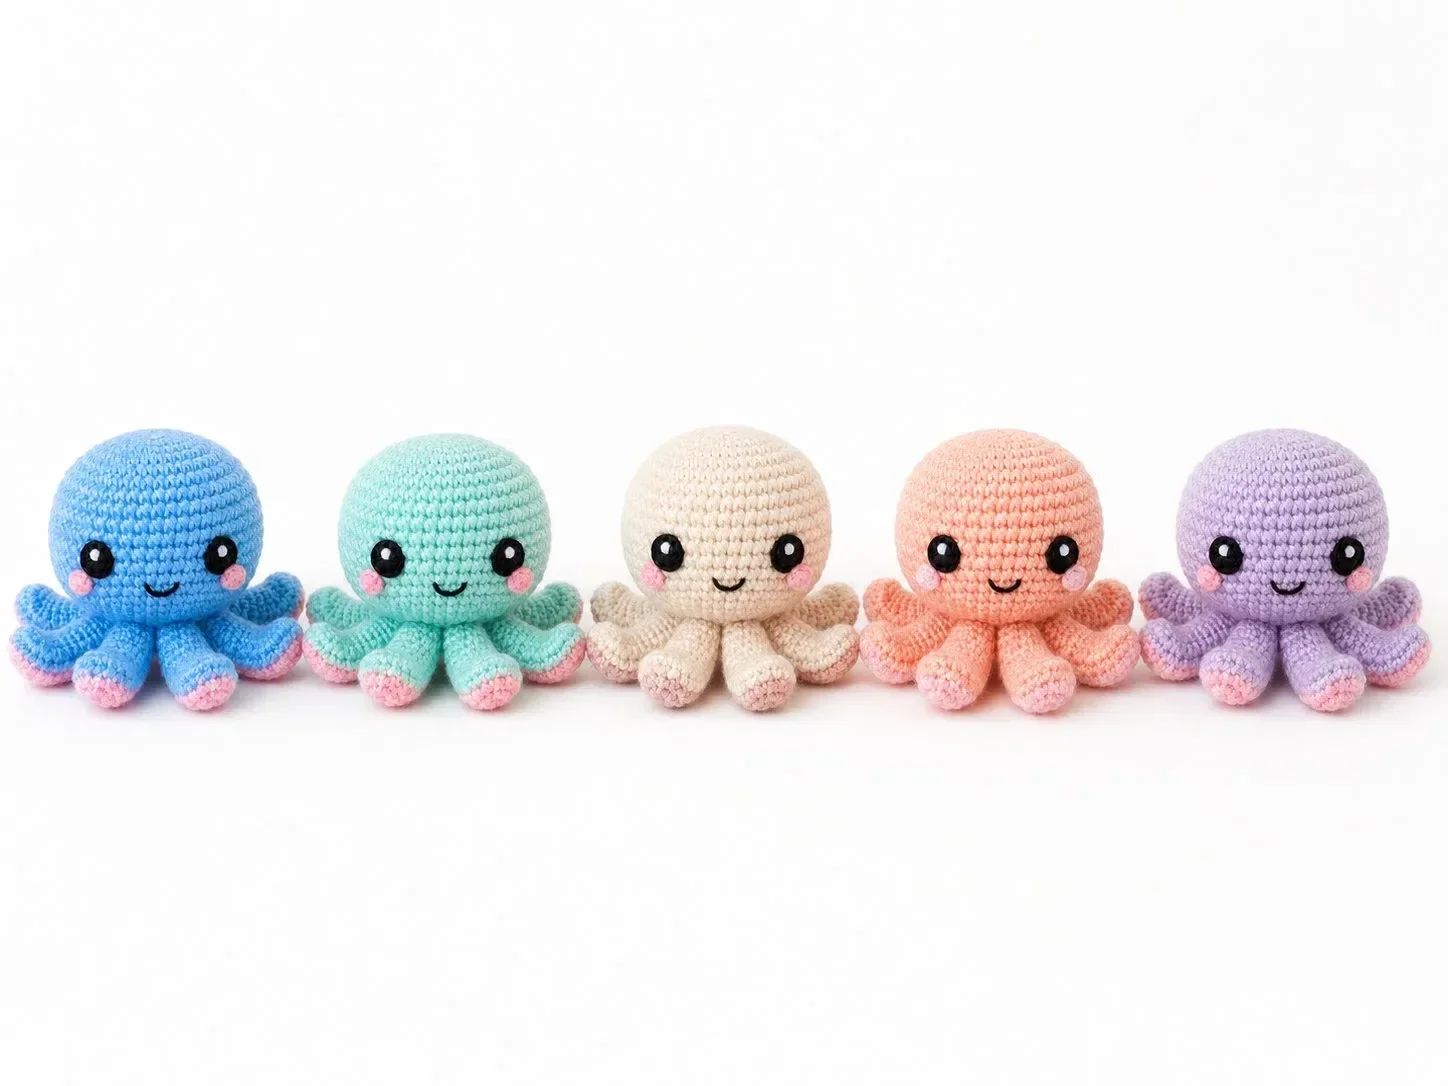
This adorable tiny octopus amigurumi is small, beginner-friendly, and quick to make. It uses simple crochet stitches, soft pastel yarn, and easy embroidered details to create a cute plush octopus with a soft kawaii look. You can make it in classic blue and pink, soft lavender, mint, cream, or any color combination you love.
Whether you are new to amigurumi or looking for a relaxing weekend crochet project, this tiny octopus pattern is a lovely one to add to your handmade collection.
Why You’ll Love This Tiny Octopus Crochet Pattern
This project is simple, cute, and very satisfying to finish. The round body works up quickly, and the tentacles give the octopus its playful personality. You can keep the design minimal with safety eyes and a small embroidered smile, or you can add extra details like rosy cheeks, yarn highlights, or tiny accessories.
It is also a great stash-busting project because it only needs a small amount of yarn. Make one octopus as a small gift, or create a whole colorful family in different pastel shades.
Finished Size
The finished octopus is approximately 8–10 cm tall, depending on your yarn weight, hook size, and tension.
Skill Level
Beginner to easy
You should know how to make:
- Magic ring
- Single crochet
- Increase
- Decrease
- Slip stitch
- Basic sewing and embroidery
Materials Needed
- Light blue yarn for the body and tentacles
- Pink yarn for the tentacle tips and cheeks
- Black yarn for the smile
- Small white yarn for eye highlights, optional
- 2 black safety eyes, 6–8 mm
- 2.5 mm or 3 mm crochet hook
- Fiberfill stuffing
- Stitch marker
- Yarn needle
- Scissors
- Sewing pins, optional
For a softer plush version, use velvet or chenille yarn with a larger hook. For a smaller keychain version, use cotton yarn and a smaller hook.
Crochet Abbreviations
- MR = magic ring
- ch = chain
- st = stitch
- sl st = slip stitch
- sc = single crochet
- inc = increase, 2 sc in the same stitch
- dec = invisible decrease
- BLO = back loop only
- FO = fasten off
Pattern Notes
Work in continuous rounds unless stated otherwise. Use a stitch marker to mark the first stitch of each round. Stuff the head firmly but not too tightly, so the shape stays round and soft. The tentacles should be lightly stuffed so they stay flexible and cute.
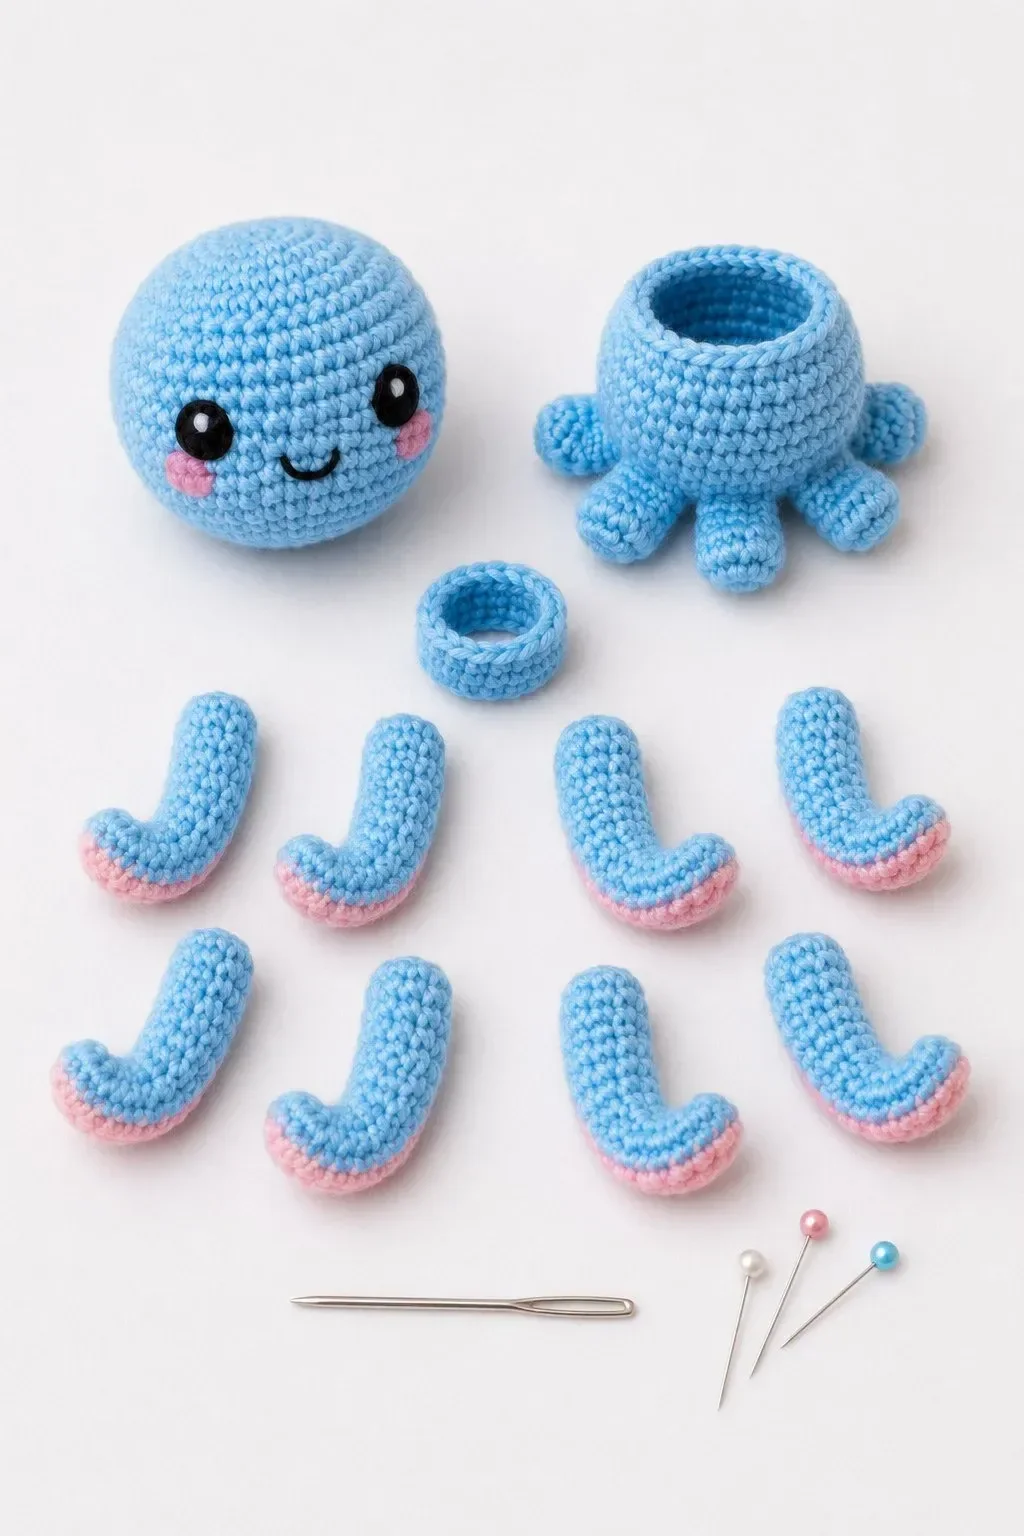
Tiny Octopus Head and Body
Use blue yarn.
Round 1: MR, 6 sc.
Round 2: inc around. 12 sts
Round 3: sc 1, inc around. 18 sts
Round 4: sc 2, inc around. 24 sts
Round 5: sc 3, inc around. 30 sts
Round 6: sc 4, inc around. 36 sts
Round 7: sc 5, inc around. 42 sts
Rounds 8–15: sc around. 42 sts
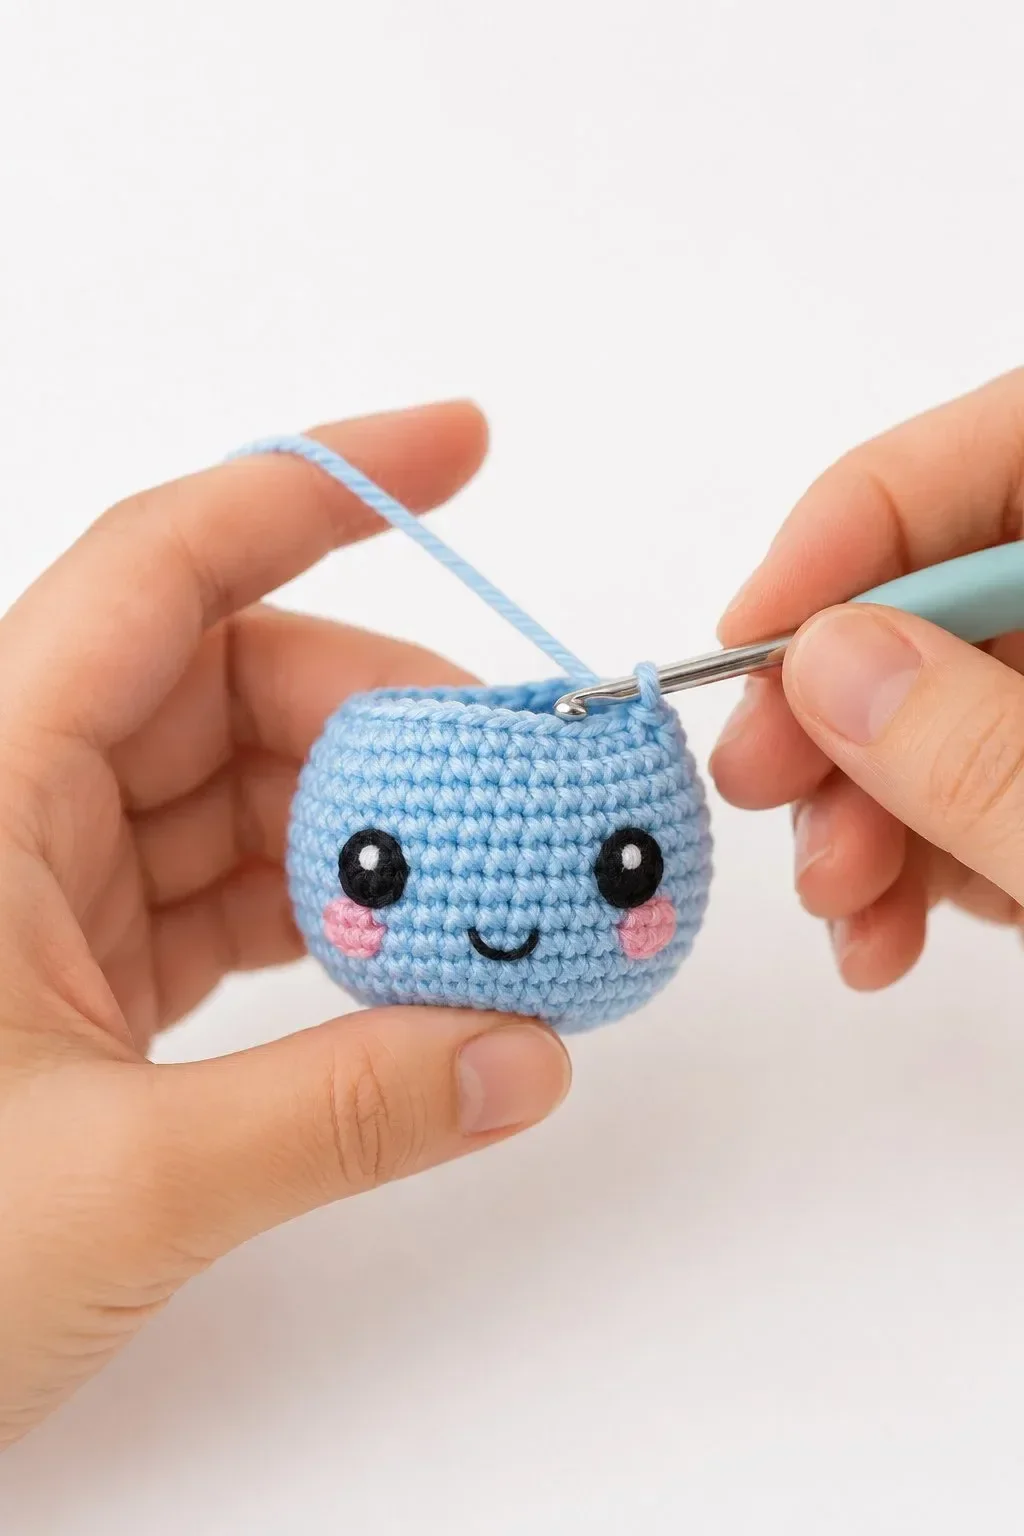
Insert the safety eyes between rounds 10 and 11, about 7–8 stitches apart. Adjust the placement until the face looks balanced and cute.
Round 16: sc 5, dec around. 36 sts
Round 17: sc 4, dec around. 30 sts
Round 18: sc 3, dec around. 24 sts
Start stuffing the body firmly.
Round 19: sc 2, dec around. 18 sts
Round 20: sc 1, dec around. 12 sts
Add more stuffing if needed.
Round 21: dec around. 6 sts
FO, leaving a tail. Close the opening with a yarn needle and weave in the end.
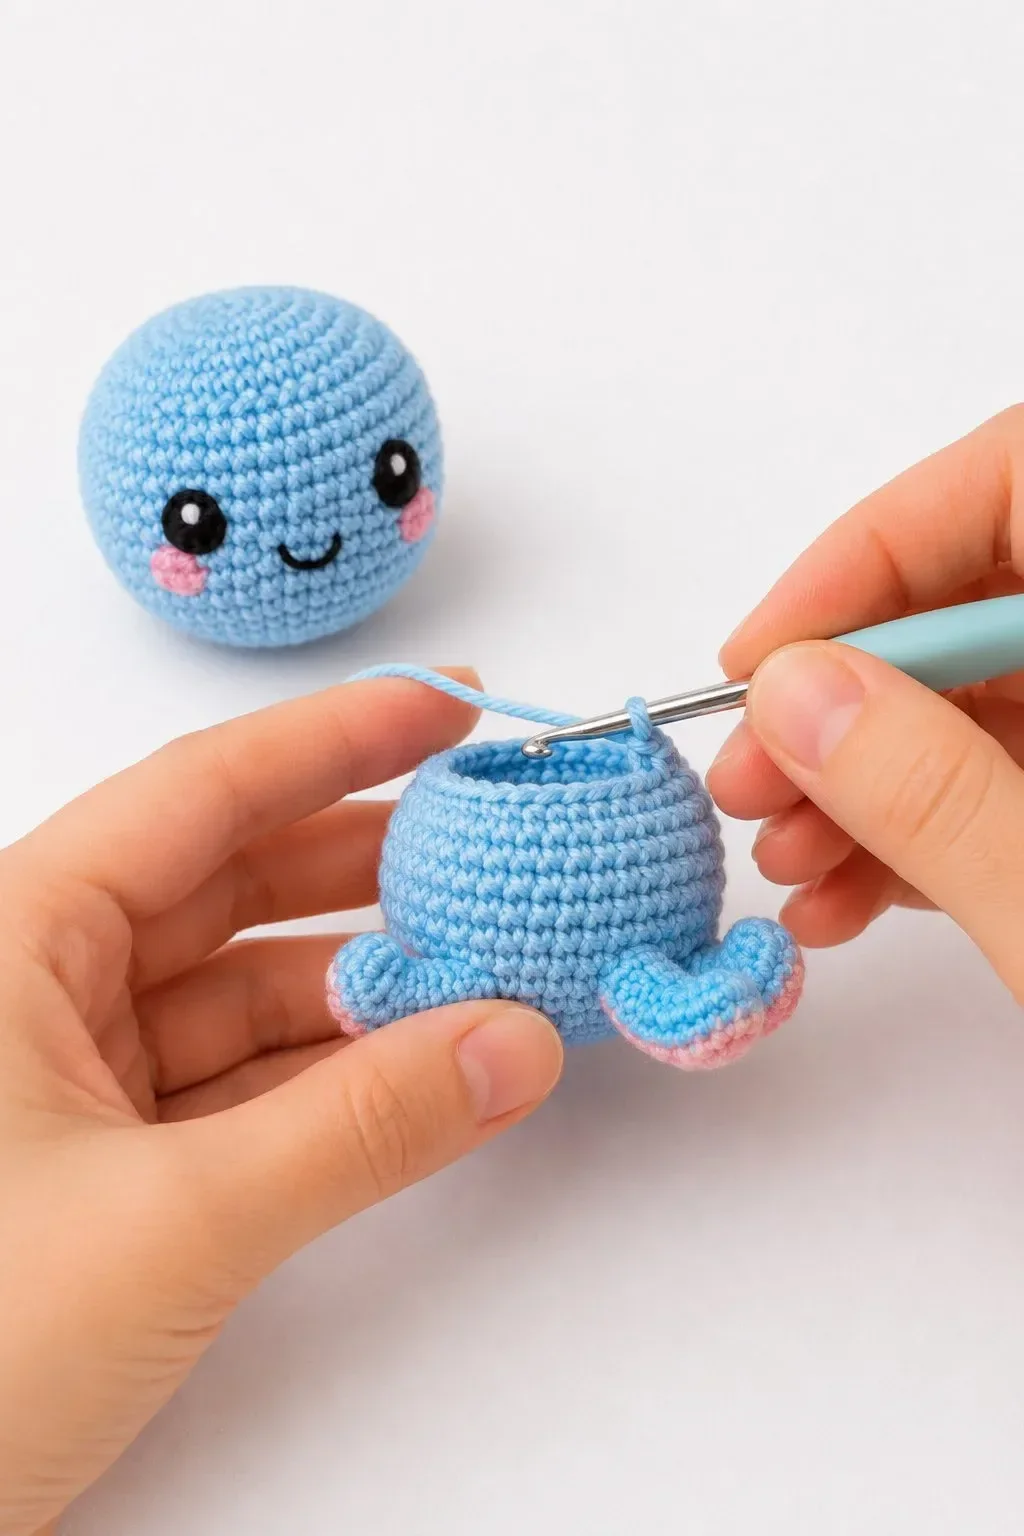
Tentacles
Make 8.
Start with pink yarn.
Round 1: MR, 6 sc.
Round 2: inc around. 12 sts
Round 3: sc around. 12 sts
Switch to blue yarn.
Rounds 4–11: sc around. 12 sts
Lightly stuff the tentacle. Do not overstuff, because the tentacle should stay soft and slightly curved.
Flatten the opening and crochet through both layers with 6 sc to close.
FO, leaving a long tail for sewing.
To create a curled shape, gently curve the tentacle while sewing it to the bottom of the body. You can also place the pink side slightly forward so the little pink tips are visible from the front.
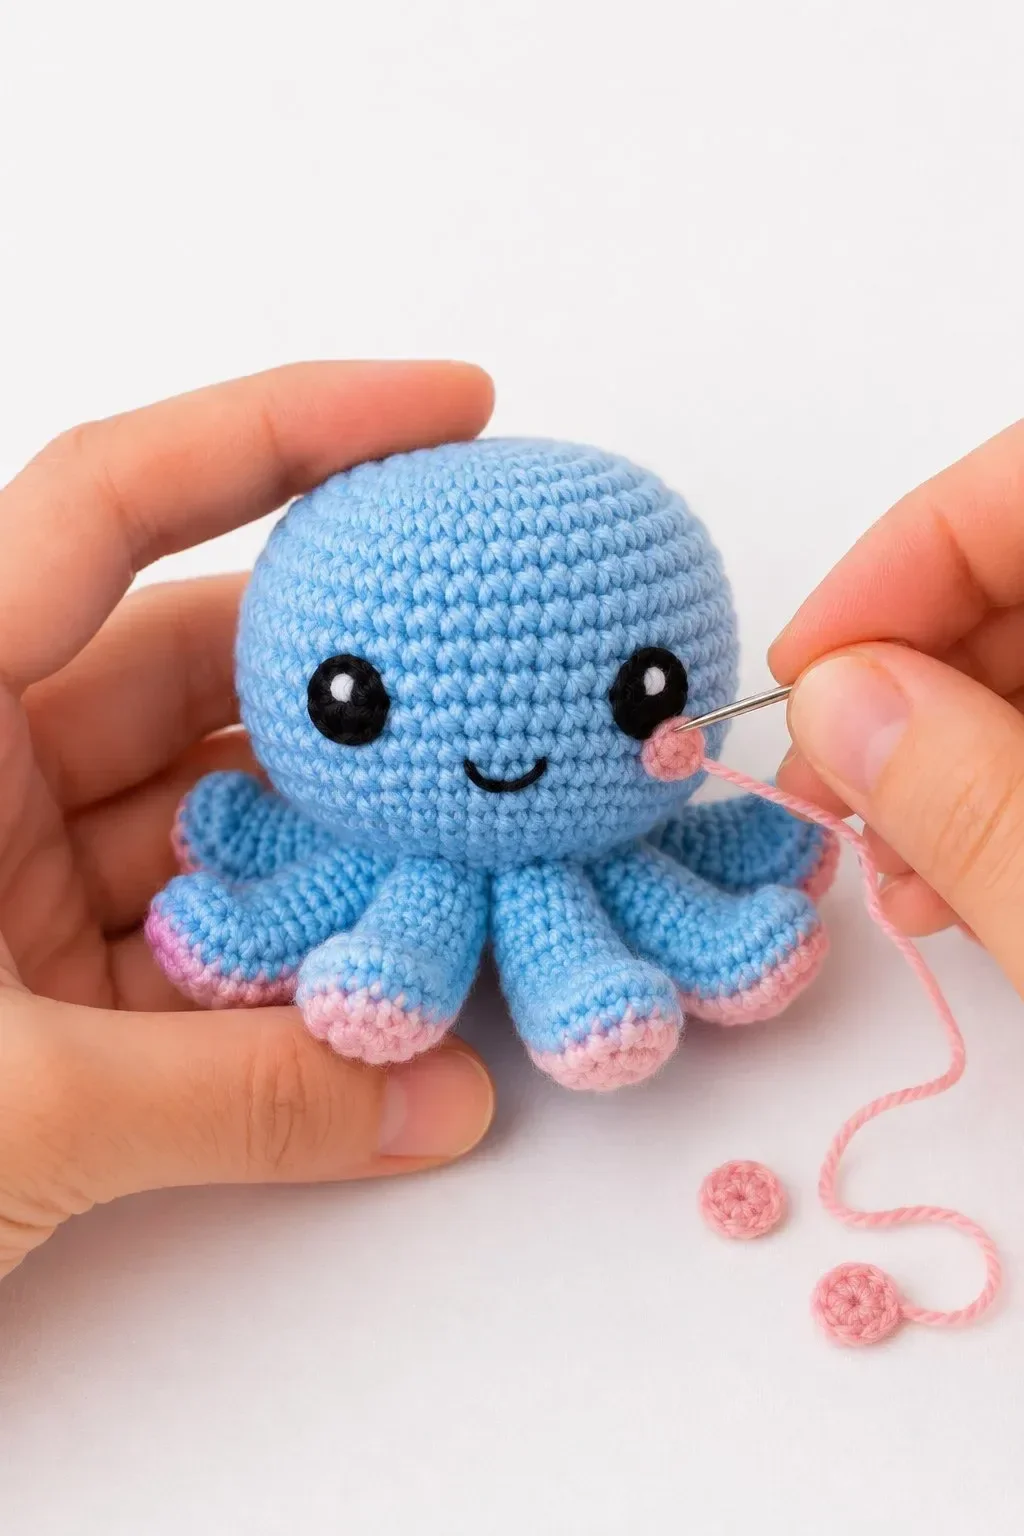
Cheeks
Make 2 with pink yarn.
Round 1: MR, 6 sc.
Sl st into the first stitch.
FO, leaving a tail for sewing.
Sew one cheek under each eye. Keep the cheeks close to the eyes for a soft kawaii expression.
Smile
Use black yarn or embroidery thread.
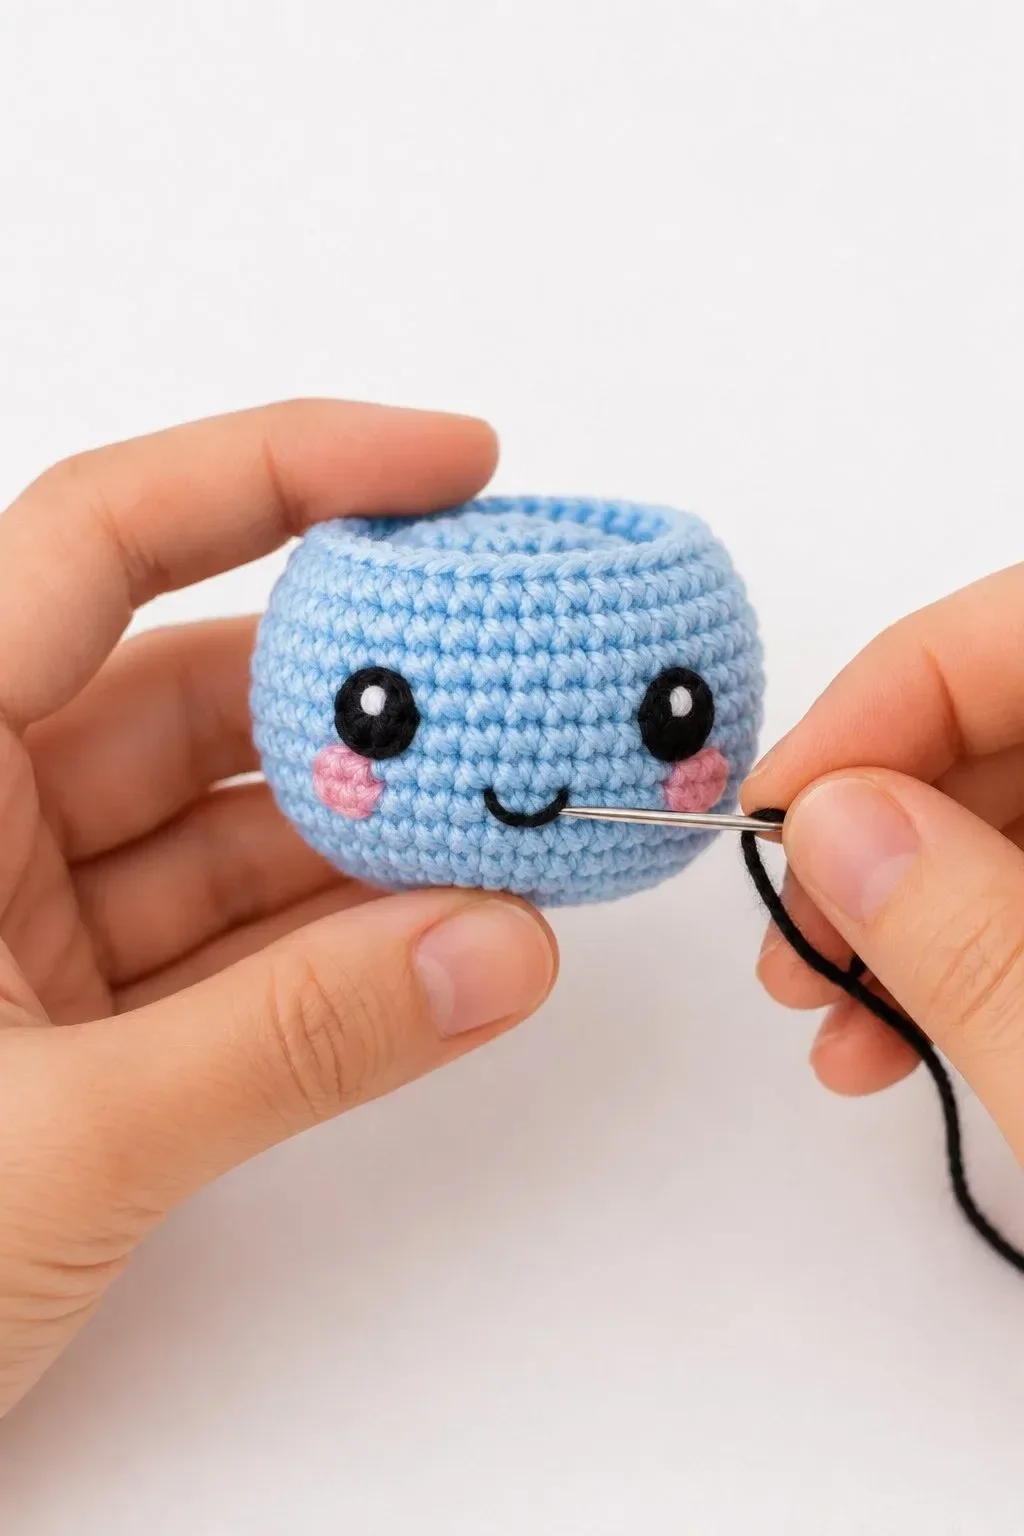
Thread your yarn needle and stitch a small curved smile between the eyes. Make the smile shallow and centered. Secure the yarn inside the body and trim any excess.
For extra detail, you can add tiny white stitches on the eyes to create a glossy highlight effect.
Assembly
Place the eight tentacles evenly around the bottom of the octopus. Pin them in place first if needed.
Sew each tentacle securely to the bottom edge of the body. Try to keep the front tentacles slightly forward and the side tentacles curved outward. This gives the octopus a fuller, more playful shape.
After sewing, gently shape the tentacles with your fingers. The finished octopus should sit nicely on a flat surface with the tentacles spread around the body.
Color Ideas
This tiny octopus looks adorable in many color combinations:
- Blue body with pink tentacle tips
- Lavender body with blush pink cheeks
- Mint green body with pastel pink details
- Cream body with beige tentacles
- Peach body with coral tips
- Rainbow set with one octopus in each pastel color
A colorful group of tiny octopuses makes a beautiful craft fair display or handmade gift set.
Helpful Tips for a Neater Finish
Use an invisible decrease to keep the stitches smooth and clean. Keep your tension tight enough so the stuffing does not show through. When changing colors on the tentacles, make the final pull-through of the last blue stitch using the pink yarn, or the final pull-through of the last pink stitch using the blue yarn. This creates a cleaner color change.
For the face, take your time with placement. A small change in eye spacing or smile height can completely change the expression. Before securing the safety eyes, place them lightly and check the face from the front.
Optional: Turn It Into a Keychain
To make your tiny octopus into a keychain, attach a small metal keyring to the top center of the head. Reinforce it with several stitches using strong yarn or thread.
For safety, avoid using safety eyes if the octopus is intended for babies or very young children. Embroidered eyes are safer for baby toys.
Frequently Asked Questions
Is this tiny octopus amigurumi beginner-friendly?
Yes. This is a great beginner amigurumi project because it uses basic stitches and simple shaping. The only part that takes patience is sewing the tentacles evenly around the body.
Can I make this octopus without safety eyes?
Yes. You can embroider the eyes using black yarn or crochet small black circles and sew them onto the face. This is a better option if the toy is for a baby or toddler.
What yarn is best for this pattern?
Cotton or acrylic yarn works well for a small, neat octopus. Chenille or velvet yarn creates a softer plush version, but it will make the finished octopus larger.
How do I make the tentacles curl?
Lightly stuff the tentacles and curve them while sewing. You can also bend them gently after assembly. Avoid overstuffing, because firm tentacles are harder to shape.
Can I sell finished octopuses made from this pattern?
Yes, handmade finished items can usually be sold at markets, online shops, or as gifts. Use your own photos and credit the pattern source if required by your publishing rules.
Final Thoughts
This tiny octopus amigurumi is one of those small crochet projects that feels cheerful from the first stitch to the final smile. It is quick enough for a weekend, simple enough for beginners, and cute enough to make again and again in every color.
Make one in soft blue and pink for the classic look, then try lavender, mint, peach, or cream for a whole collection of adorable handmade sea friends.