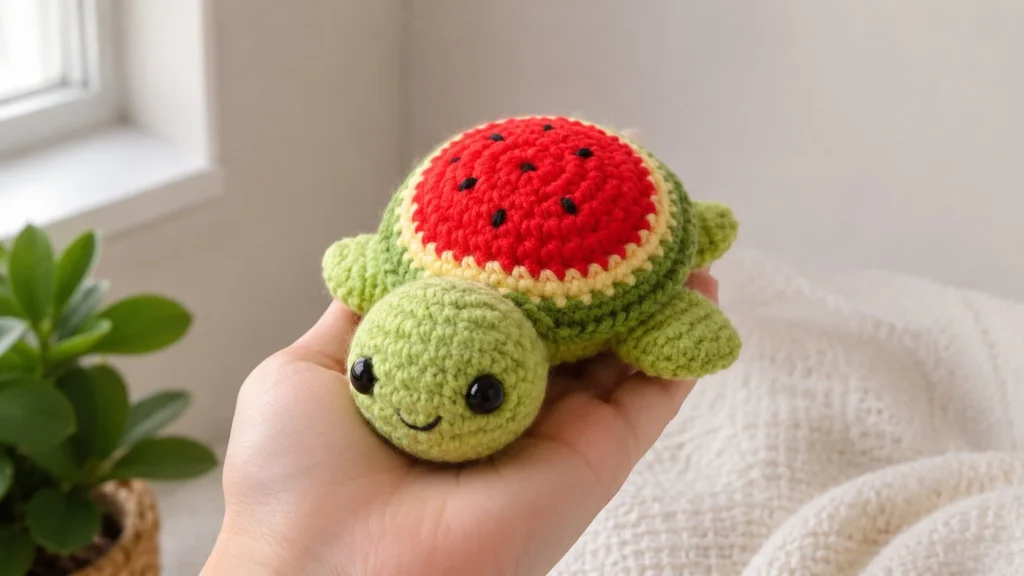
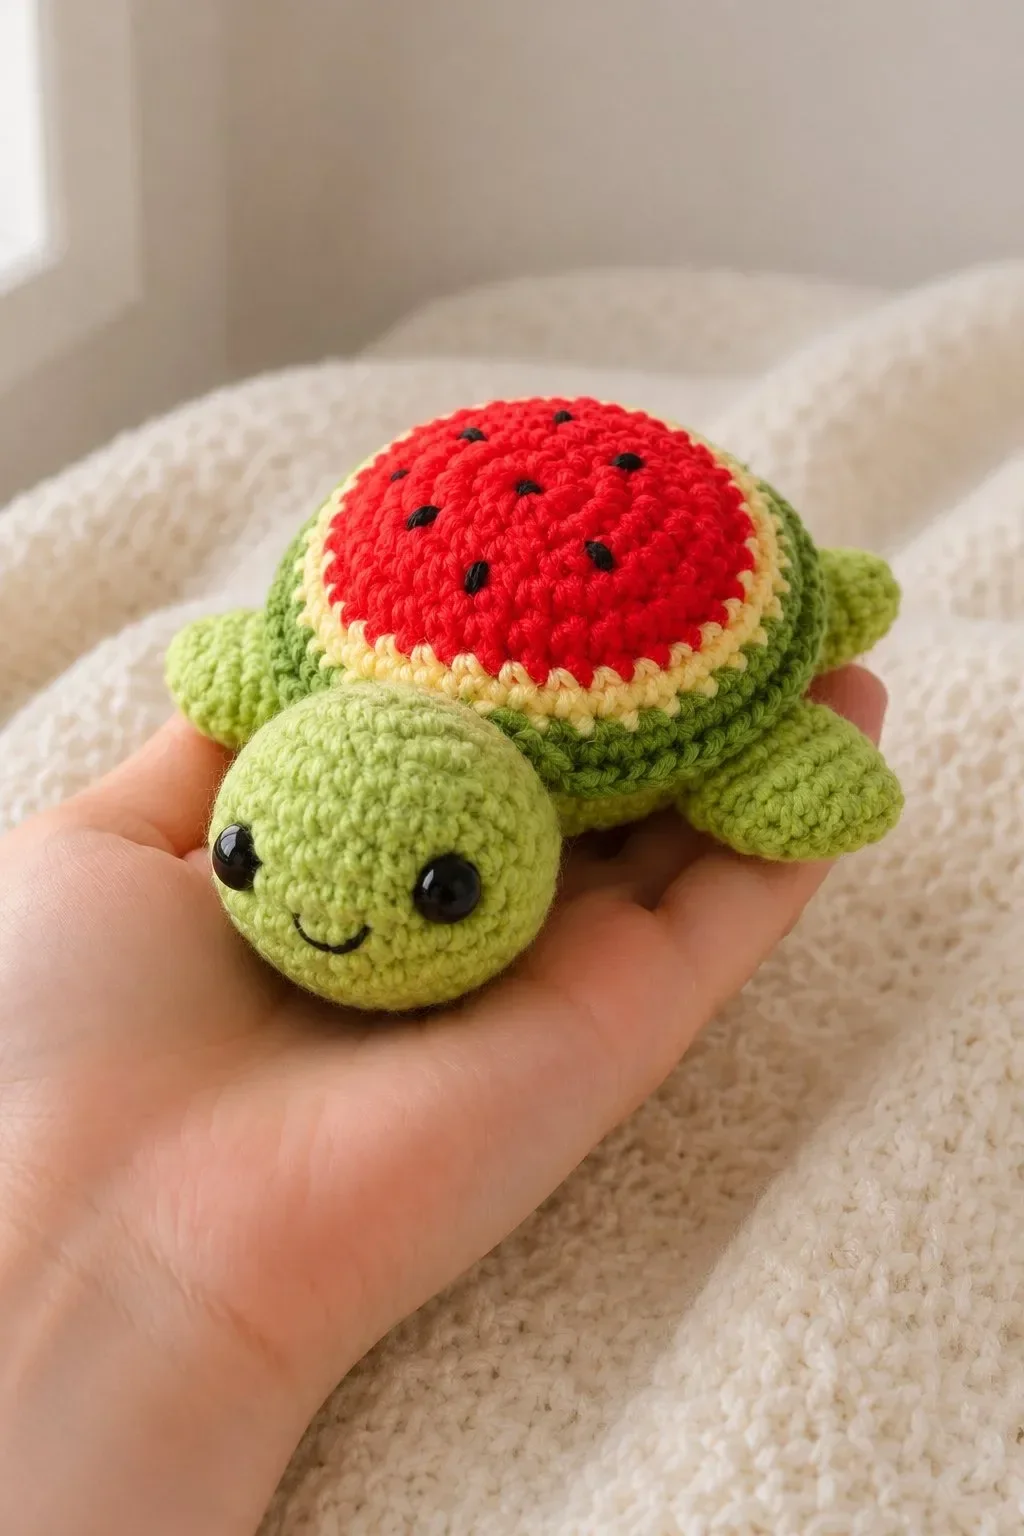
This Crochet Fruit Turtle Pattern is a bright, playful amigurumi project inspired by a tiny turtle carrying a watermelon-style fruit shell on its back. With a soft green head, rounded flippers, glossy black eyes, a gentle smile, and a colorful red, yellow, and green shell, this little turtle looks sweet, cheerful, and perfect for summer crochet collections.
The finished turtle has a cute handmade look with a rounded turtle body, a separate fruit-slice shell top, tiny black embroidered seeds, and soft curved limbs. It makes a lovely gift, nursery decoration, desk buddy, craft fair item, or ocean-and-fruit themed amigurumi project.
Why You’ll Love This Fruit Turtle
This project combines two adorable ideas: a baby turtle and a watermelon slice. The result is a colorful amigurumi toy that feels fresh, cute, and unique.
The design is also easy to customize. You can make the classic watermelon shell, or change the shell colors to create orange, kiwi, lemon, strawberry, dragon fruit, or pastel fantasy turtles.
Finished Size
The finished fruit turtle measures approximately 13–16 cm long, depending on your yarn, hook size, and tension.
Cotton yarn gives a clean, defined stitch look. Plush or chenille yarn gives a larger, softer turtle.
Skill Level
Easy / confident beginner
You should know how to make:
- Magic ring
- Single crochet
- Increase
- Invisible decrease
- Slip stitch
- Basic color changes
- Basic sewing
- Simple embroidery
Materials Needed
- Light green yarn for the turtle head, body, flippers, and tail
- Darker green yarn for the shell edge
- Red yarn for the watermelon shell center
- Pale yellow or cream yarn for the rind stripe
- Black embroidery thread for smile and seeds
- 2 black safety eyes, 8–10 mm
- Fiberfill stuffing
- Crochet hook suitable for your yarn
- Stitch marker
- Yarn needle
- Scissors
- Sewing pins
For a baby-safe version, embroider the eyes instead of using safety eyes.
Abbreviations
This pattern uses US crochet terms.
- MR = magic ring
- ch = chain
- st = stitch
- sl st = slip stitch
- sc = single crochet
- inc = increase, 2 sc in the same stitch
- dec = invisible decrease
- BLO = back loop only
- FLO = front loop only
- FO = fasten off
Pattern Notes
Work in continuous rounds unless stated otherwise. Use a stitch marker to mark the first stitch of each round.
This turtle is made from several simple parts: head, body base, fruit shell top, four flippers, and a tiny tail. The parts are crocheted separately and sewn together.
The shell is designed to look like a raised fruit slice: red center, pale yellow rind, green outer edge, and small black embroidered seeds.
Crochet Pattern
Head

Use light green yarn.
Round 1: MR, 6 sc.
6 sts
Round 2: inc around.
12 sts
Round 3: (sc 1, inc) x6.
18 sts
Round 4: (sc 2, inc) x6.
24 sts
Round 5: (sc 3, inc) x6.
30 sts
Rounds 6–11: sc around.
30 sts
Insert safety eyes between rounds 7 and 8, about 7 stitches apart.
Round 12: (sc 3, dec) x6.
24 sts
Start stuffing the head.
Round 13: (sc 2, dec) x6.
18 sts
Round 14: (sc 1, dec) x6.
12 sts
Add more stuffing.
Round 15: dec around.
6 sts
FO, close the opening, and leave a long tail for sewing.
Using black embroidery thread, stitch a small curved smile under the eyes.
Body Base
Use light green yarn.
This piece creates the soft turtle base that sits under the fruit shell.
Round 1: MR, 6 sc.
6 sts
Round 2: inc around.
12 sts
Round 3: (sc 1, inc) x6.
18 sts
Round 4: (sc 2, inc) x6.
24 sts
Round 5: (sc 3, inc) x6.
30 sts
Round 6: (sc 4, inc) x6.
36 sts
Round 7: (sc 5, inc) x6.
42 sts
Round 8: BLO sc around.
42 sts
Rounds 9–12: sc around.
42 sts
Round 13: (sc 5, dec) x6.
36 sts
FO, leaving a long tail for sewing.
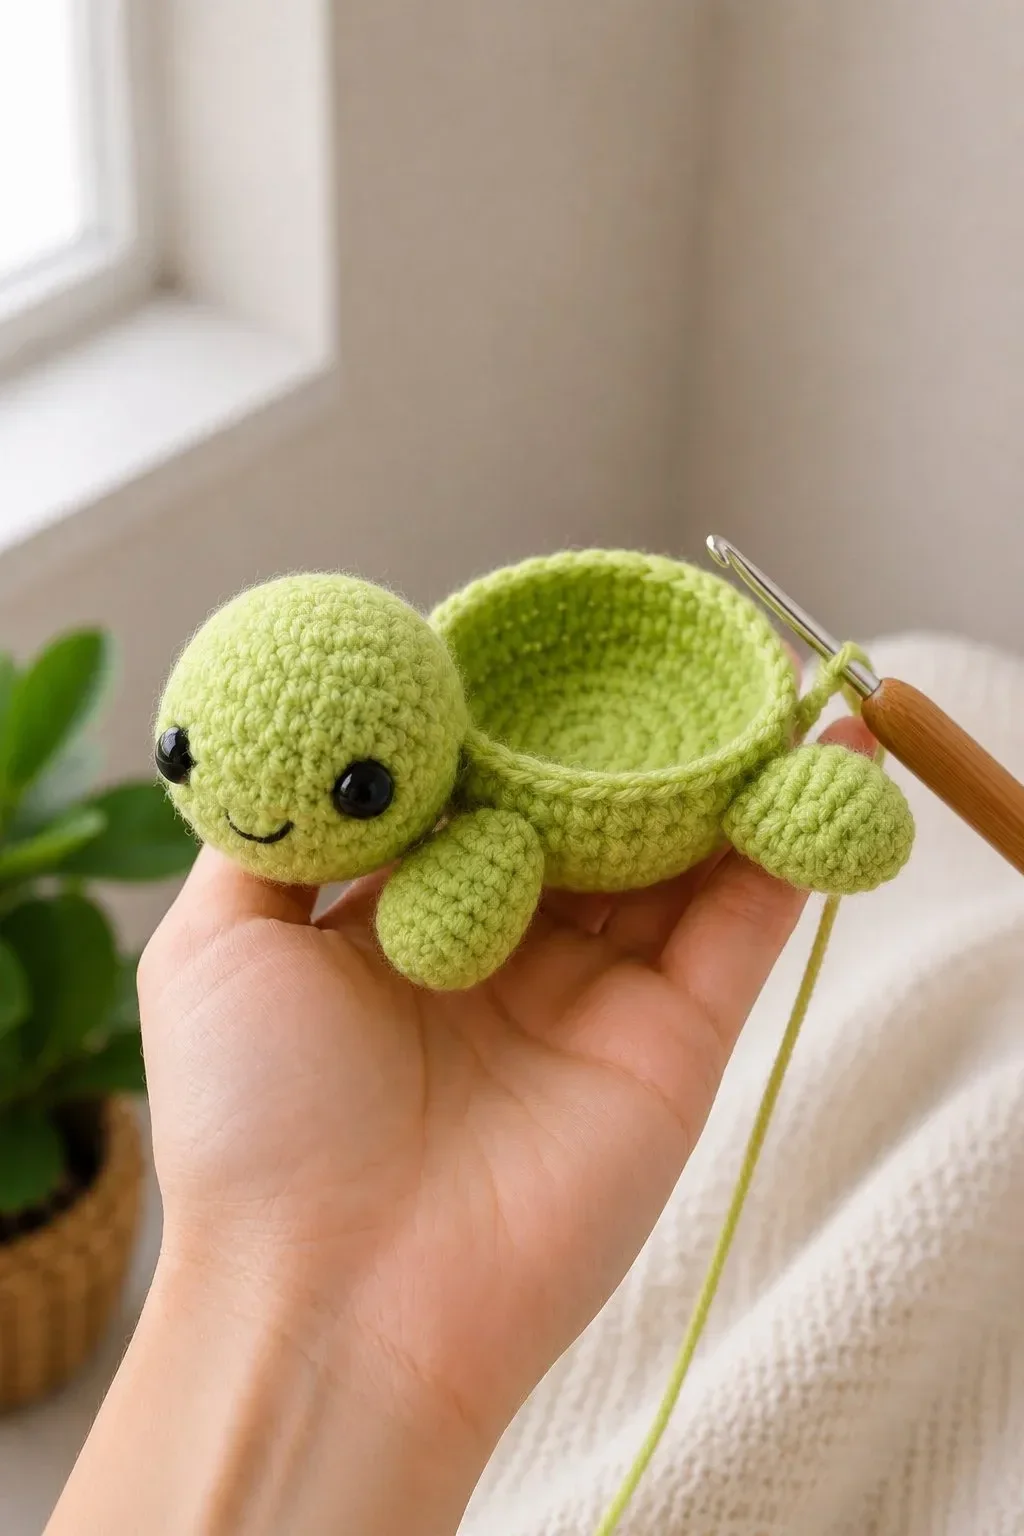
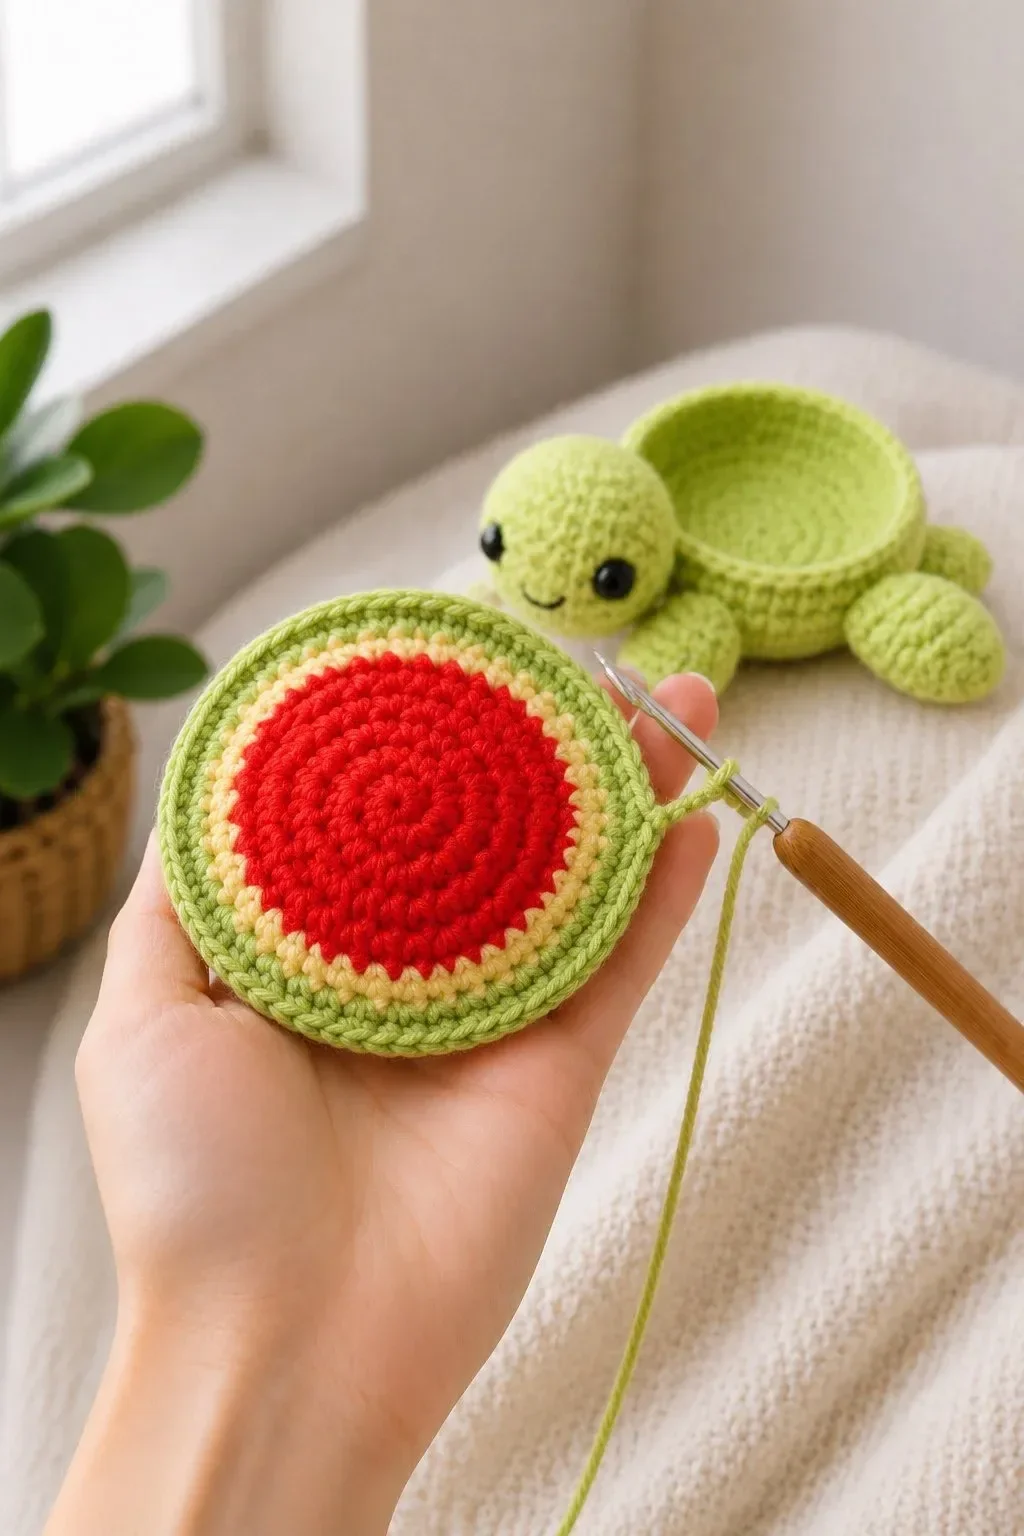
Lightly stuff the body base. Keep the top slightly open and bowl-like, as shown in the reference images. The fruit shell top will sit over this section.
Fruit Shell Top
Start with red yarn.
Round 1: MR, 6 sc.
6 sts
Round 2: inc around.
12 sts
Round 3: (sc 1, inc) x6.
18 sts
Round 4: (sc 2, inc) x6.
24 sts
Round 5: (sc 3, inc) x6.
30 sts
Round 6: (sc 4, inc) x6.
36 sts
Round 7: (sc 5, inc) x6.
42 sts
Round 8: (sc 6, inc) x6.
48 sts
Switch to pale yellow or cream yarn.
Round 9: sc around.
48 sts
Switch to dark green yarn.
Round 10: sc around.
48 sts
Round 11: BLO sc around.
48 sts
Rounds 12–13: sc around.
48 sts
FO, leaving a long tail for sewing.
Lightly stuff the shell top so it forms a soft dome, but keep the bottom fairly flat. Sew the shell top onto the body base, leaving the head, flippers, and tail positions free.
Shell Border Detail
To make the green edge look more defined, attach dark green yarn to the front loops left from Round 11 of the shell.
Work one round of:
sl st in each front loop around.
FO and weave in the end.
This creates a clean raised edge around the fruit shell, similar to the visible green border in the images.
Black Watermelon Seeds
Use black embroidery thread.
Add small vertical seed stitches across the red part of the shell. Space them naturally and avoid making them too large.
A good layout is:
- 1 seed near the center
- 4–5 seeds around the middle area
- 4–6 seeds closer to the outer red area
Keep the seeds small and slightly oval.
Front Flippers
Make 2 with light green yarn.
Round 1: MR, 6 sc.
6 sts
Round 2: inc around.
12 sts
Round 3: (sc 1, inc) x6.
18 sts
Rounds 4–6: sc around.
18 sts
Round 7: (sc 1, dec) x6.
12 sts
Lightly stuff.
Rounds 8–9: sc around.
12 sts
Flatten the opening and crochet 6 sc across both layers to close.
FO, leaving a long tail for sewing.
Sew the front flippers to the front sides of the body, just behind the head. Angle them slightly outward.
Back Flippers
Make 2 with light green yarn.
Round 1: MR, 6 sc.
6 sts
Round 2: inc around.
12 sts
Round 3: (sc 1, inc) x6.
18 sts
Rounds 4–5: sc around.
18 sts
Round 6: (sc 1, dec) x6.
12 sts
Lightly stuff.
Flatten the opening and crochet 6 sc across both layers to close.
FO, leaving a long tail for sewing.
Sew the back flippers to the rear sides of the turtle body. Keep them slightly flatter than the front flippers.
Tail
Use light green yarn.
Round 1: MR, 4 sc.
4 sts
Round 2: (sc 1, inc) x2.
6 sts
Round 3: sc around.
6 sts
Round 4: (sc 2, inc) x2.
8 sts
FO, leaving a tail for sewing.
Do not stuff, or stuff very lightly. Sew the tail to the back center of the turtle body.
Assembly
Pin all pieces before sewing.
First, sew the head to the front of the body base. The head should sit slightly lower than the shell, giving the turtle a cute forward-facing pose.
Next, sew the front flippers on both sides of the body, close to the head. Then sew the back flippers to the rear sides.
Place the fruit shell top over the body base and sew it securely around the edge. Make sure the red fruit section sits centered on the turtle’s back.
Finally, sew the tail to the back. Weave in all ends securely.
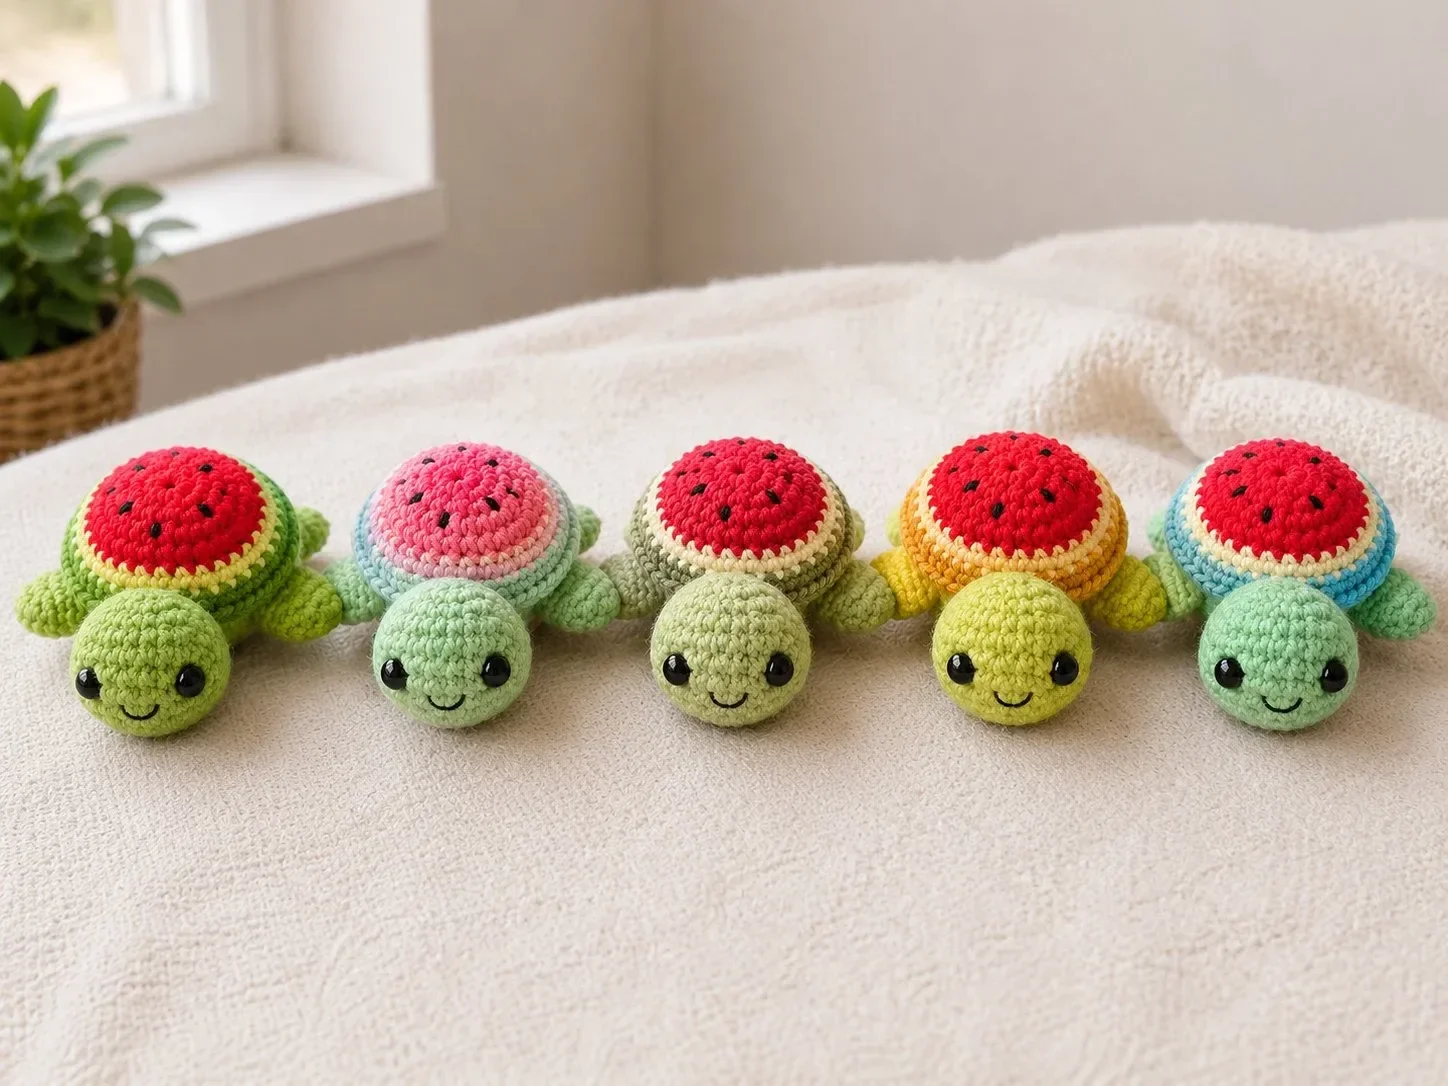
Optional Fruit Variations
You can use the same pattern to create different fruit turtles.
Watermelon Turtle
- Green body
- Red shell center
- Pale yellow rind
- Green shell edge
- Black seeds
Kiwi Turtle
- Soft green body
- Bright green shell center
- Cream inner ring
- Brown shell edge
- Black seeds
Orange Turtle
- Light orange body
- Orange shell center
- Cream rind
- Dark orange edge
Lemon Turtle
- Pale yellow body
- Yellow shell center
- Cream rind
- Soft green edge
Dragon Fruit Turtle
- White shell center
- Pink outer shell
- Green body
- Black seeds
Beginner Tips
Use stitch markers for every round. This helps keep the shell and body symmetrical.
Do not overstuff the shell. The top should look softly domed, not like a ball.
Pin the head and flippers before sewing. This makes it easier to balance the turtle and match the cute pose from the reference images.
Keep the seed embroidery small. Large seeds can make the shell look crowded.
Use a smaller hook than the yarn label recommends so the stuffing does not show through.
Care Instructions
Spot clean gently with a damp cloth. If made with cotton or acrylic yarn, the turtle can be hand washed carefully in cold water.
Do not twist or wring. Gently press with a towel and let it air dry completely.
If using safety eyes, always check that they are secure before gifting. For babies and toddlers, embroidered eyes are safer.
Frequently Asked Questions
Is this crochet fruit turtle beginner-friendly?
Yes. It is suitable for confident beginners who know basic amigurumi techniques, including single crochet, increases, decreases, and sewing parts together.
Is this pattern no-sew?
No. This version uses simple sewing for the head, shell, flippers, and tail. The sewing is beginner-friendly and helps the turtle match the reference shape more accurately.
Can I use plush yarn?
Yes. Plush yarn will make the turtle larger and softer. Use a larger hook, larger safety eyes, and add stuffing carefully so the shell keeps its rounded fruit-slice shape.
How do I make the shell look like a watermelon?
Use red for the center, pale yellow for one rind round, and green for the outer shell edge. Then embroider small black seeds on the red section.
Can I make the turtle smaller?
Yes. Use thinner yarn and a smaller hook. Sport weight cotton with a 2 mm hook will create a smaller keychain-sized turtle.
Can I sell finished fruit turtles made from this pattern?
Yes, you can sell finished handmade turtles. Use your own photos for listings, product pages, or craft market displays.
Final Thoughts
This Crochet Fruit Turtle Pattern is a cheerful project full of color and personality. The soft green turtle body, rounded smiling face, tiny flippers, and watermelon-inspired shell make it a fun amigurumi piece for summer gifts, nursery decor, and handmade collections.
Make the classic watermelon turtle first, then try kiwi, lemon, orange, and dragon fruit versions for a full set of adorable fruit turtles.